Smart Load-Balancing for Azure OpenAI with Azure API Management
Table of Contents
Introduction #
This post was updated on June 13, 2024 to reflect the latest Azure OpenAI updates.
In this post, we will guide you through the process of consolidating various Azure OpenAI resources behind a unified API endpoint using Azure API Management (APIM). While there have been numerous discussions on this topic previously, this article focuses on a more sophisticated approach. This method enables us to address the following use cases:
- Aggregating multiple Azure OpenAI resources, potentially across various regions, with a preference for prioritizing in-region resources.
- Handling spillover from Provisioned Throughput Units in Azure OpenAI (“committed capacity”) to Pay-as-you-go in case the limits of your committed capacity are reached.
- A combination of both scenarios.
The original idea comes from my colleague, Andre Dewes, and his initial implementation. You can find the latest code from him and a few others under: Azure-Samples/openai-apim-lb.
To recap, in Azure OpenAI you have the following throughput constraints:
Pay-as-you-go
Within each region and subscription, there are specific Tokens-per-Minute (TPM) and Requests-per-Minute (RPM) limits per model.
These limits can be increased by using the “Request Quota” link within the Azure OpenAI Studio.
If we exhaust TPMs or RPMs in a particular region and/or subscription, we will encounter
429errors.As a mitigation, we can either redirect our API calls to another region or utilize a different subscription.
Provisioned Throughput Units (PTUs)
In the committed capacity scenario, we provision a set of PTUs that offer a designated throughput (dependent on our workload pattern).
Upon reaching 100% utilization of our allocated throughput, we will encounter
429errors.In this situation, we can either provision additional PTUs or revert to Pay-as-you-go.
To streamline this process, we can leverage APIM and “hide” multiple Azure OpenAI resources behind it, as illustrated in this diagram:

The groups of resources can contain one or more Azure OpenAI endpoints, with the key being to assign a priority to each group. This approach allows us to first utilize committed capacity, subsequently transitioning to Pay-as-you-go resources if needed. Alternatively, it offers the flexibility to prioritize resources within the region before doing cross-region API calls. In the event of all resources being exhausted, we will revert back to the initial resource and relay its response to the API caller.
Tutorial #
Provision Azure API Management #
Firstly, we want to provision an Azure API Management instance and ensure that we enable Managed Identity during provisioning. It’ll make most sense to put our APIM instance in the same region where our primary Azure OpenAI instance lives in.
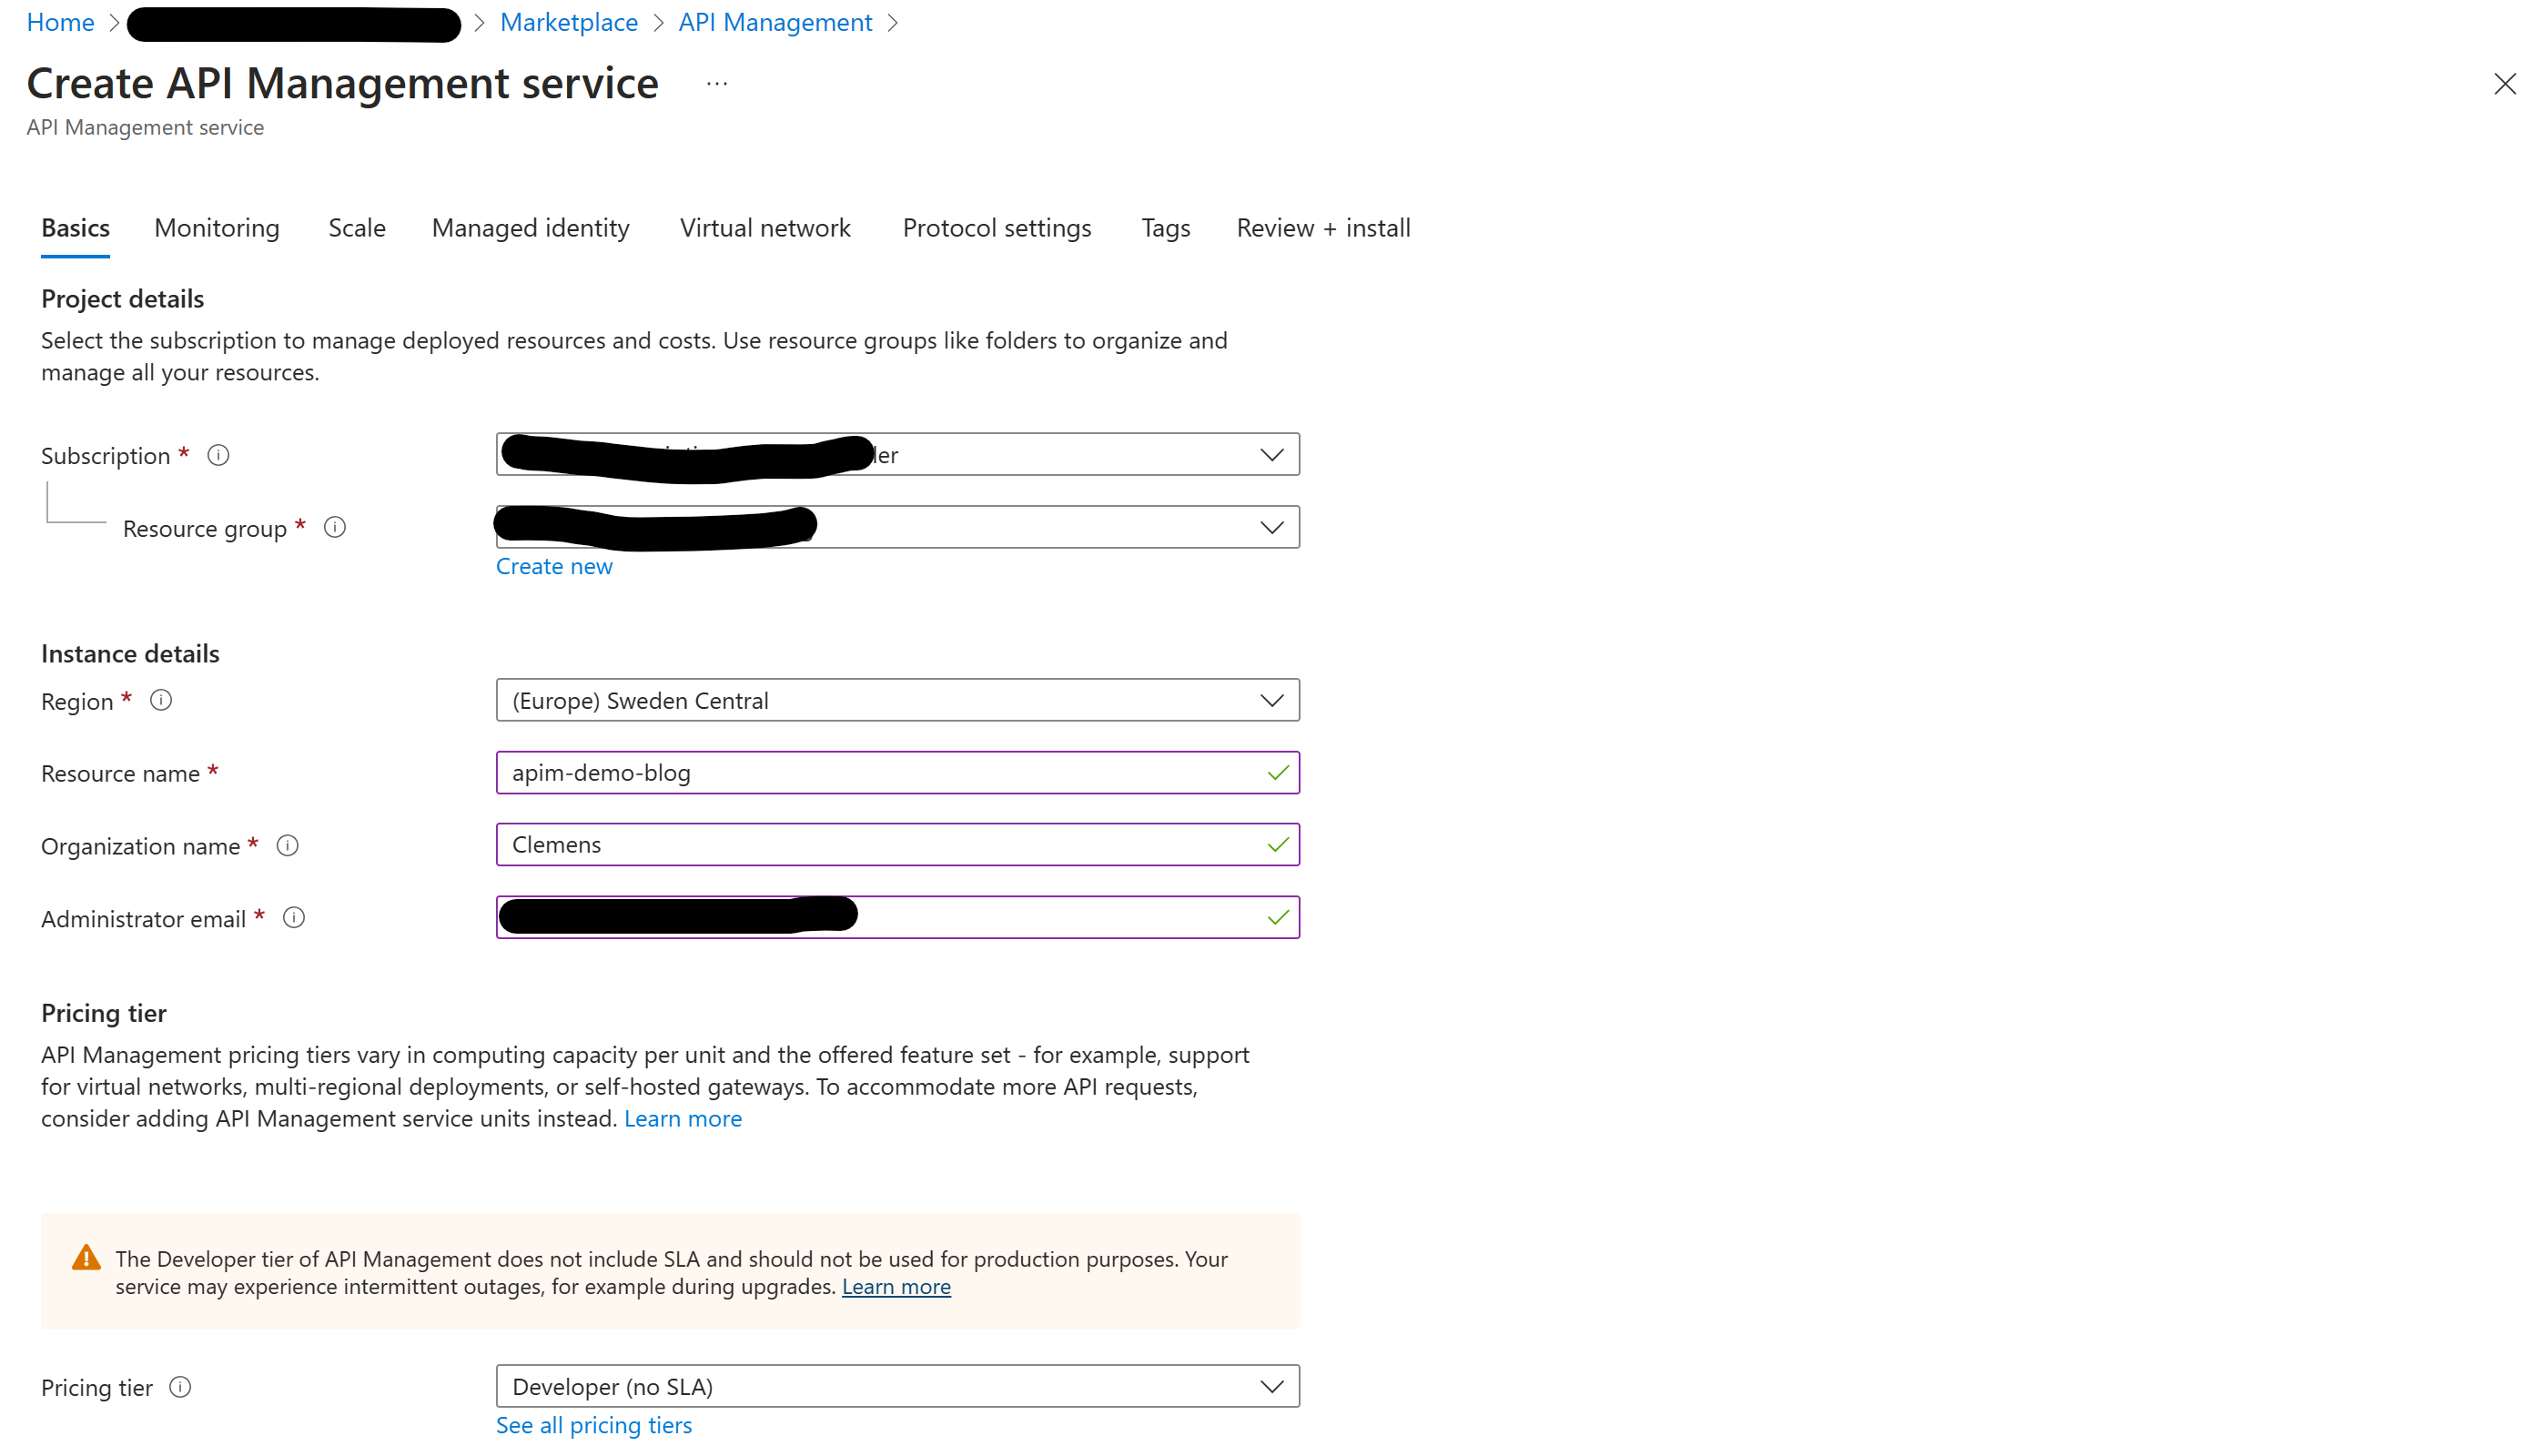
To get started, use the Azure Portal to provision an API Management instance: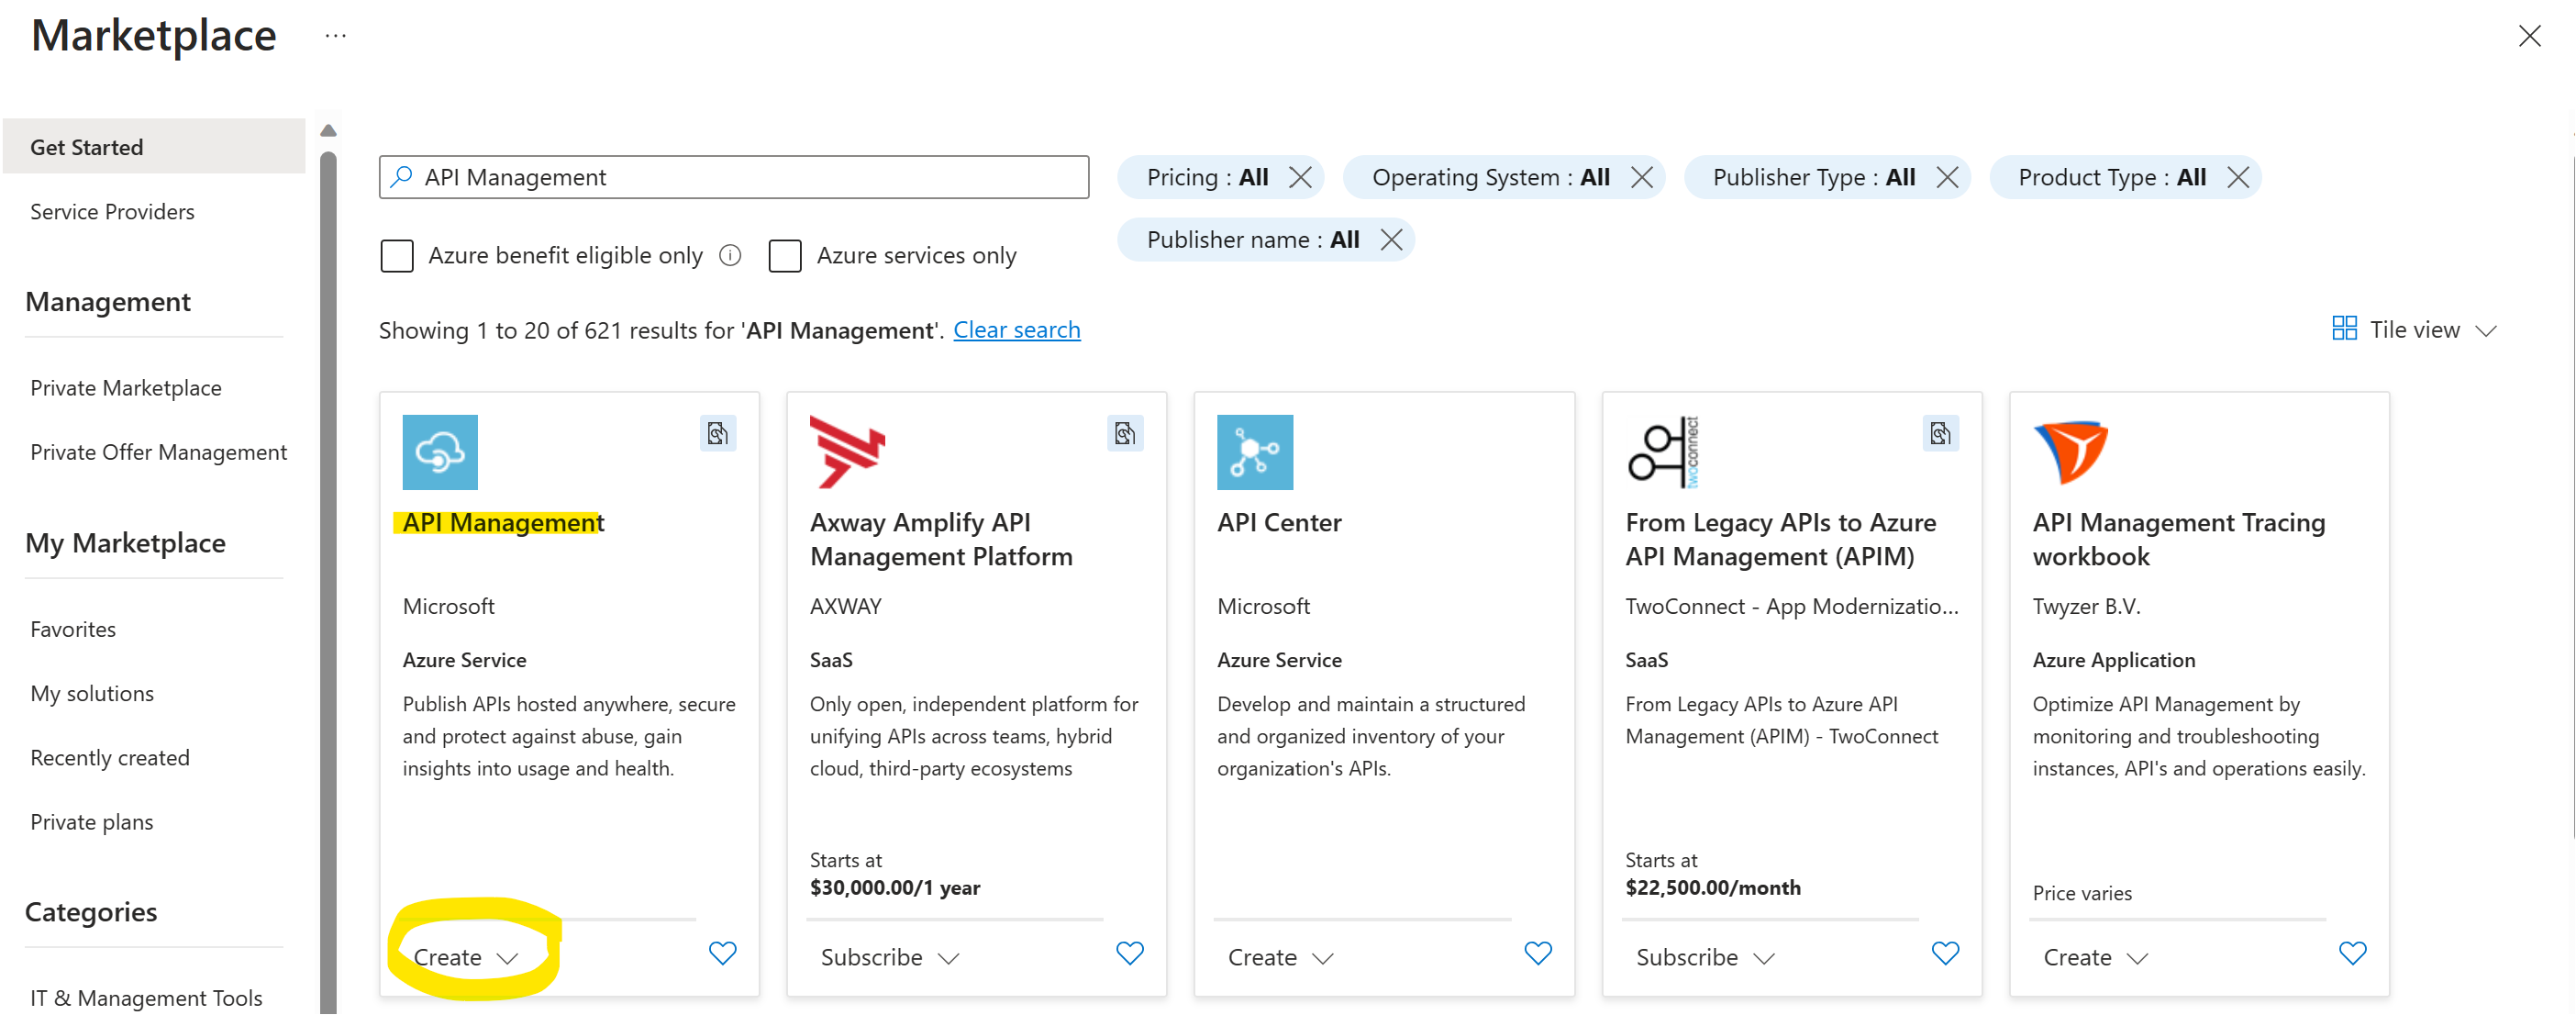
For the pricing tier, use the tier that suits our needs, I’ve tested with Developer and Basic tiers.
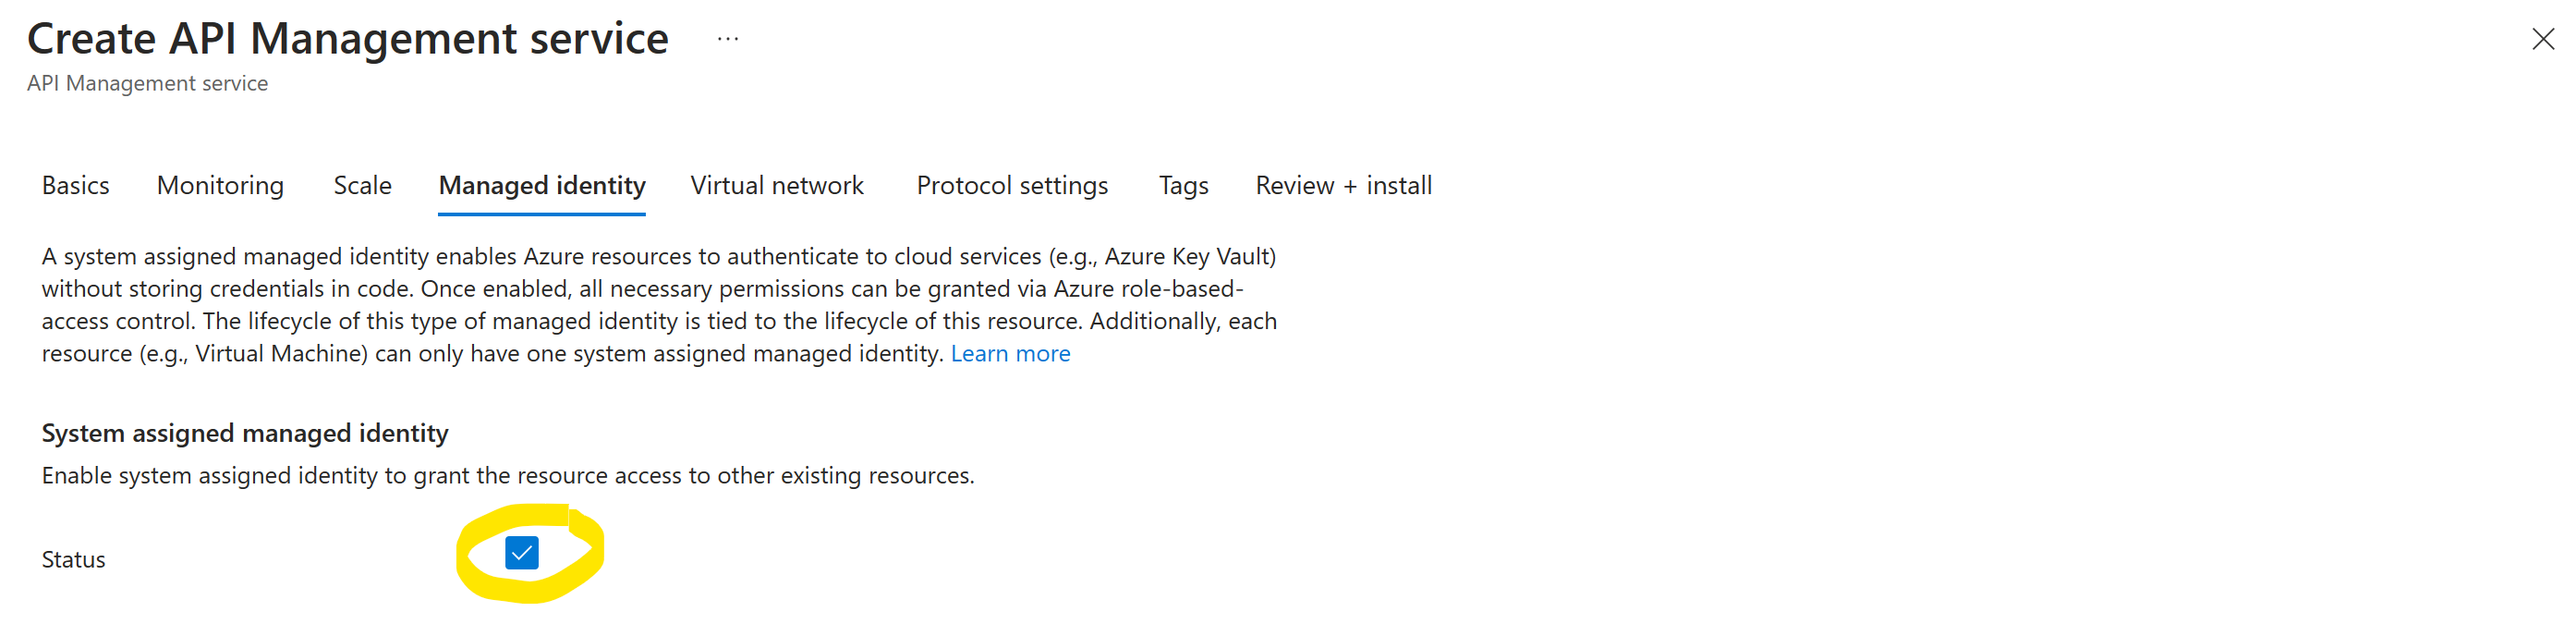
Lastly, we shouldn’t forget to enable Managed Identity during provisioning:
Provision Azure OpenAI and assign Managed Identity #
Next, ensure that your Azure OpenAI resources are prepared. Since we will be directing API calls through APIM to multiple resources, it is essential to confirm that each Azure OpenAI resource has the same models (type and version) deployed, and, crucially, with identical names. For instance:
- Azure OpenAI resource 1 -> Model deployment with name
gpt-4-8k-0613(model type:gpt-4-8k, version:0613) - Azure OpenAI resource 2 -> Model deployment with name
gpt-4-8k-0613(model type:gpt-4-8k, version:0613)
I recommend adopting a uniform naming scheme for each deployment by encoding the model type and version in its name (e.g., gpt-4-turbo-1106).
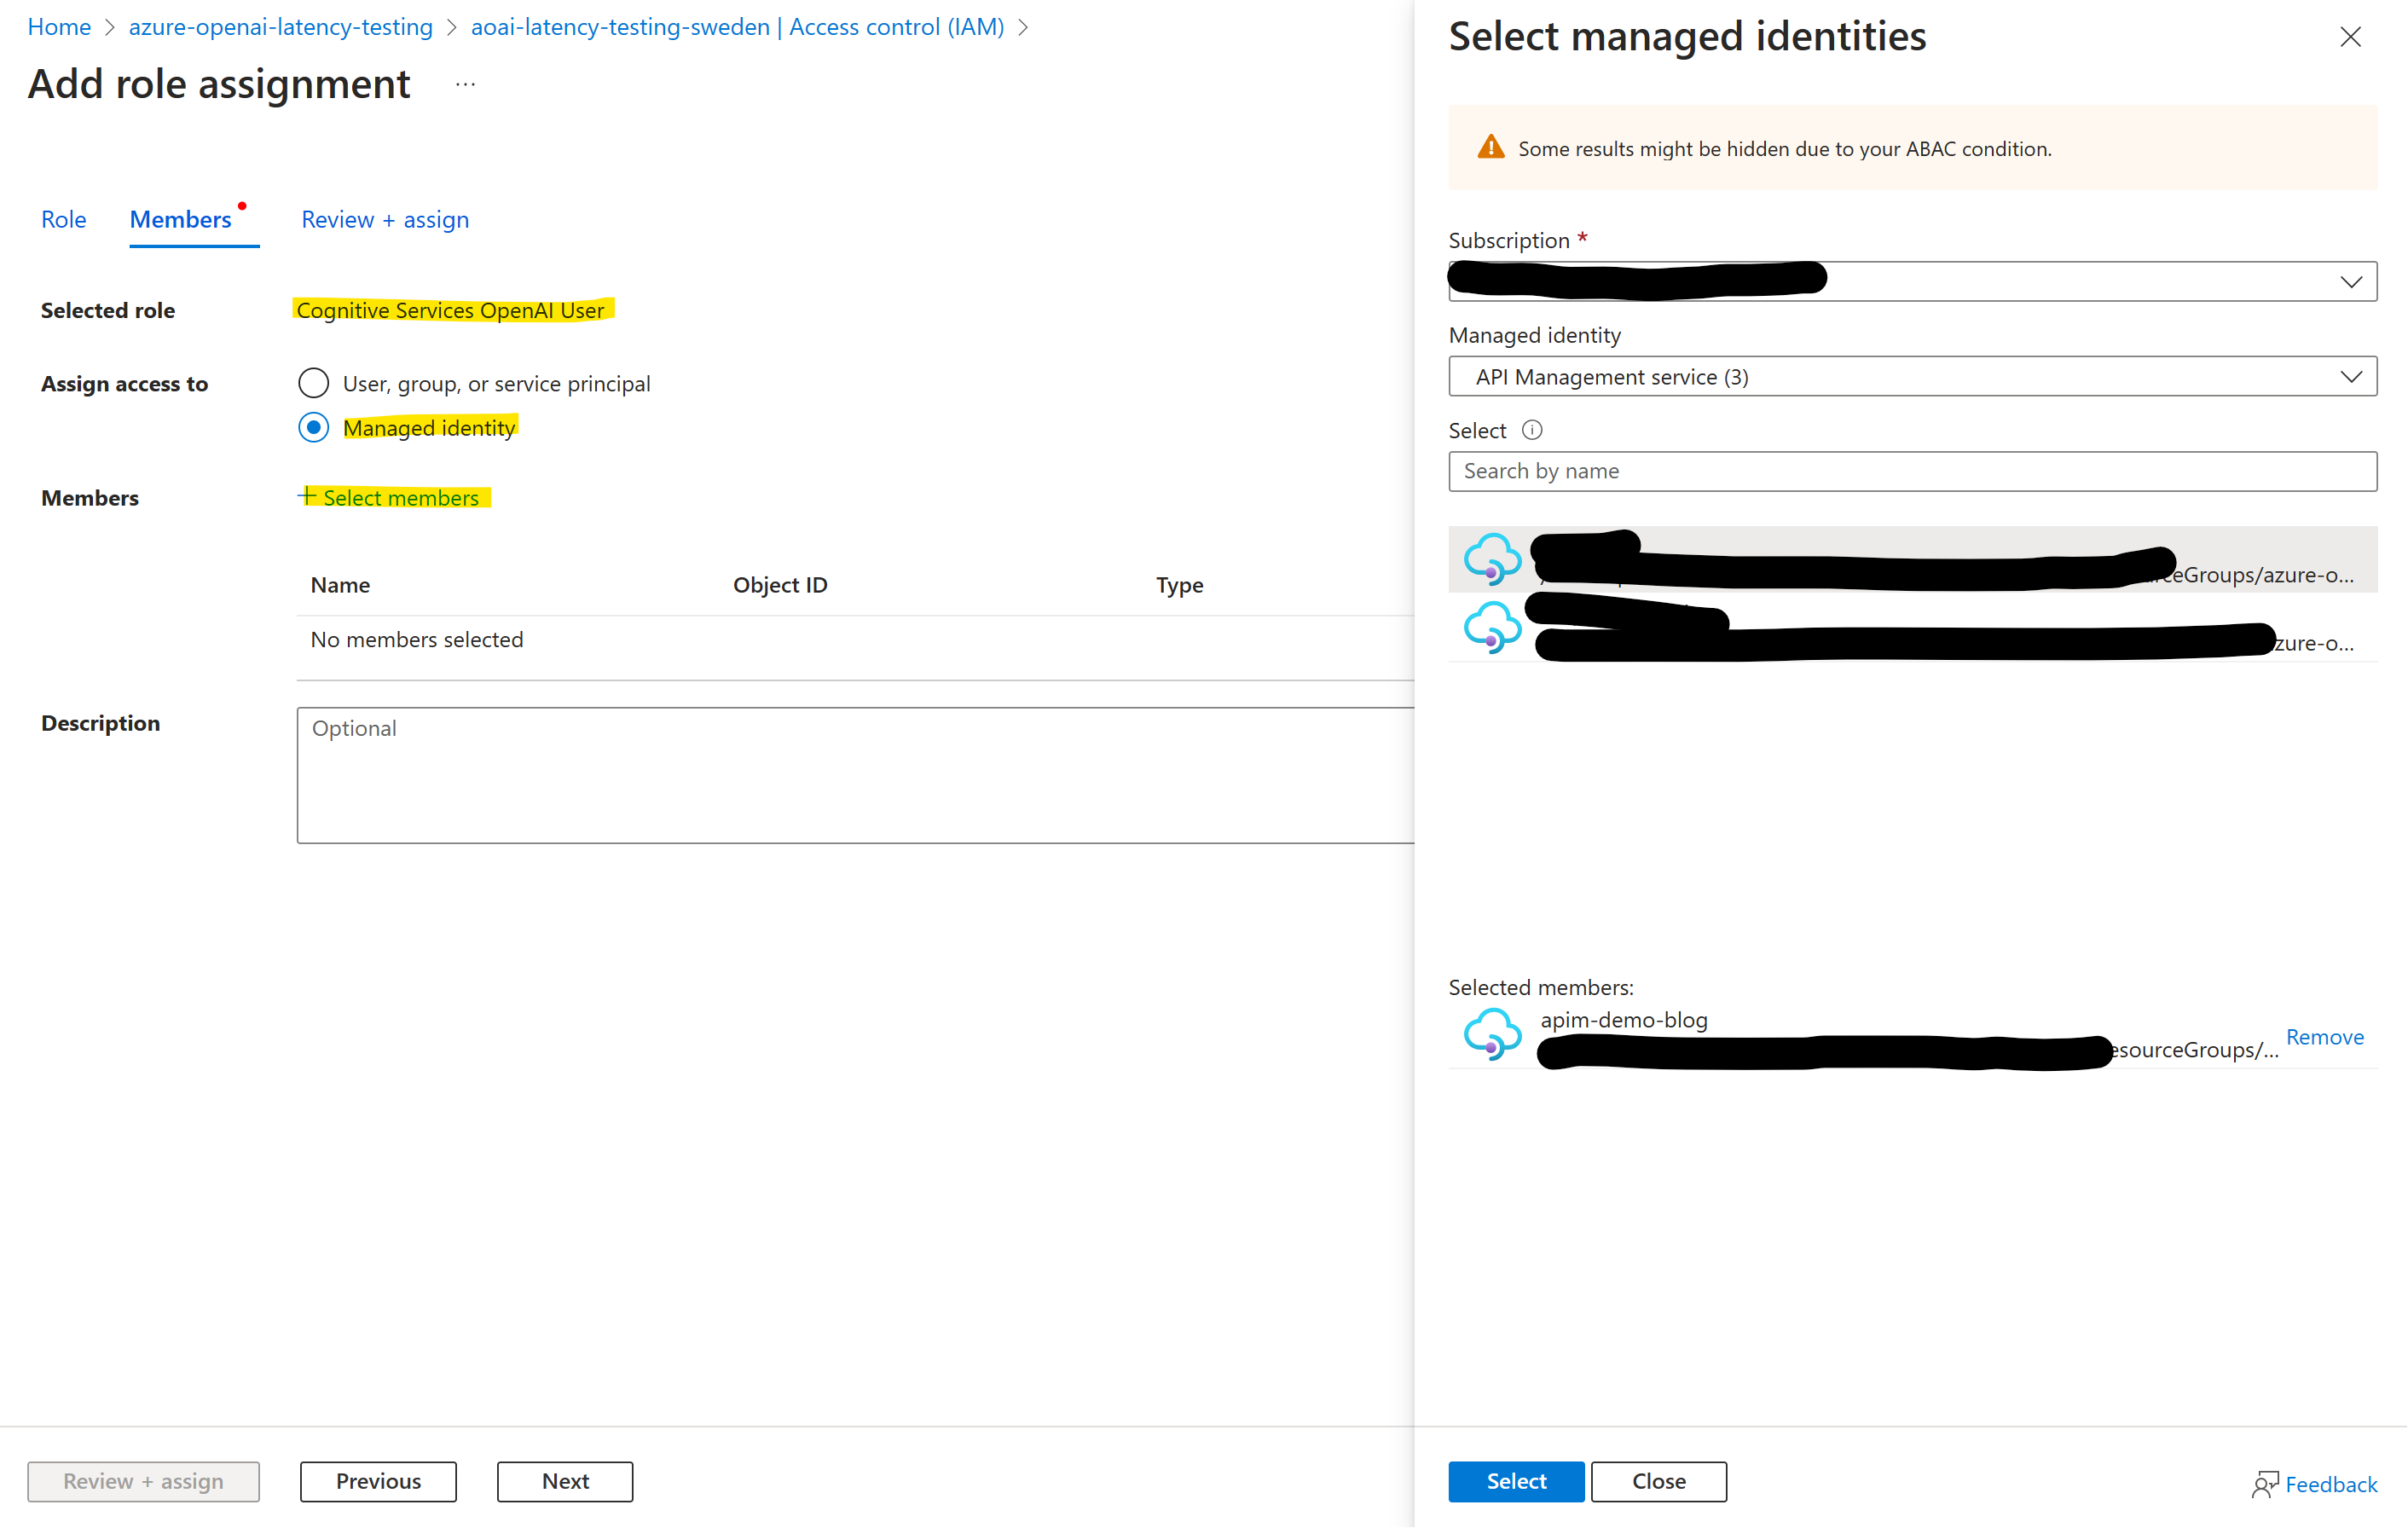
To complete this step, we must provide API Management with access to our Azure OpenAI resources. However, for security considerations, let’s refrain from using API keys. Instead, we should add the Managed Identity of the APIM to each Azure OpenAI resource, granting it the Cognitive Services OpenAI User permission. We may perform this step while the APIM instance is still in the provisioning stage.
So for each Azure OpenAI Service instance, we need to add the Managed Identity of the API Management. For this, goto each Azure OpenAI instance in the Azure Portal, click Access control (IAM), click + Add, click Add role assignment, select the role Cognitive Services OpenAI User:
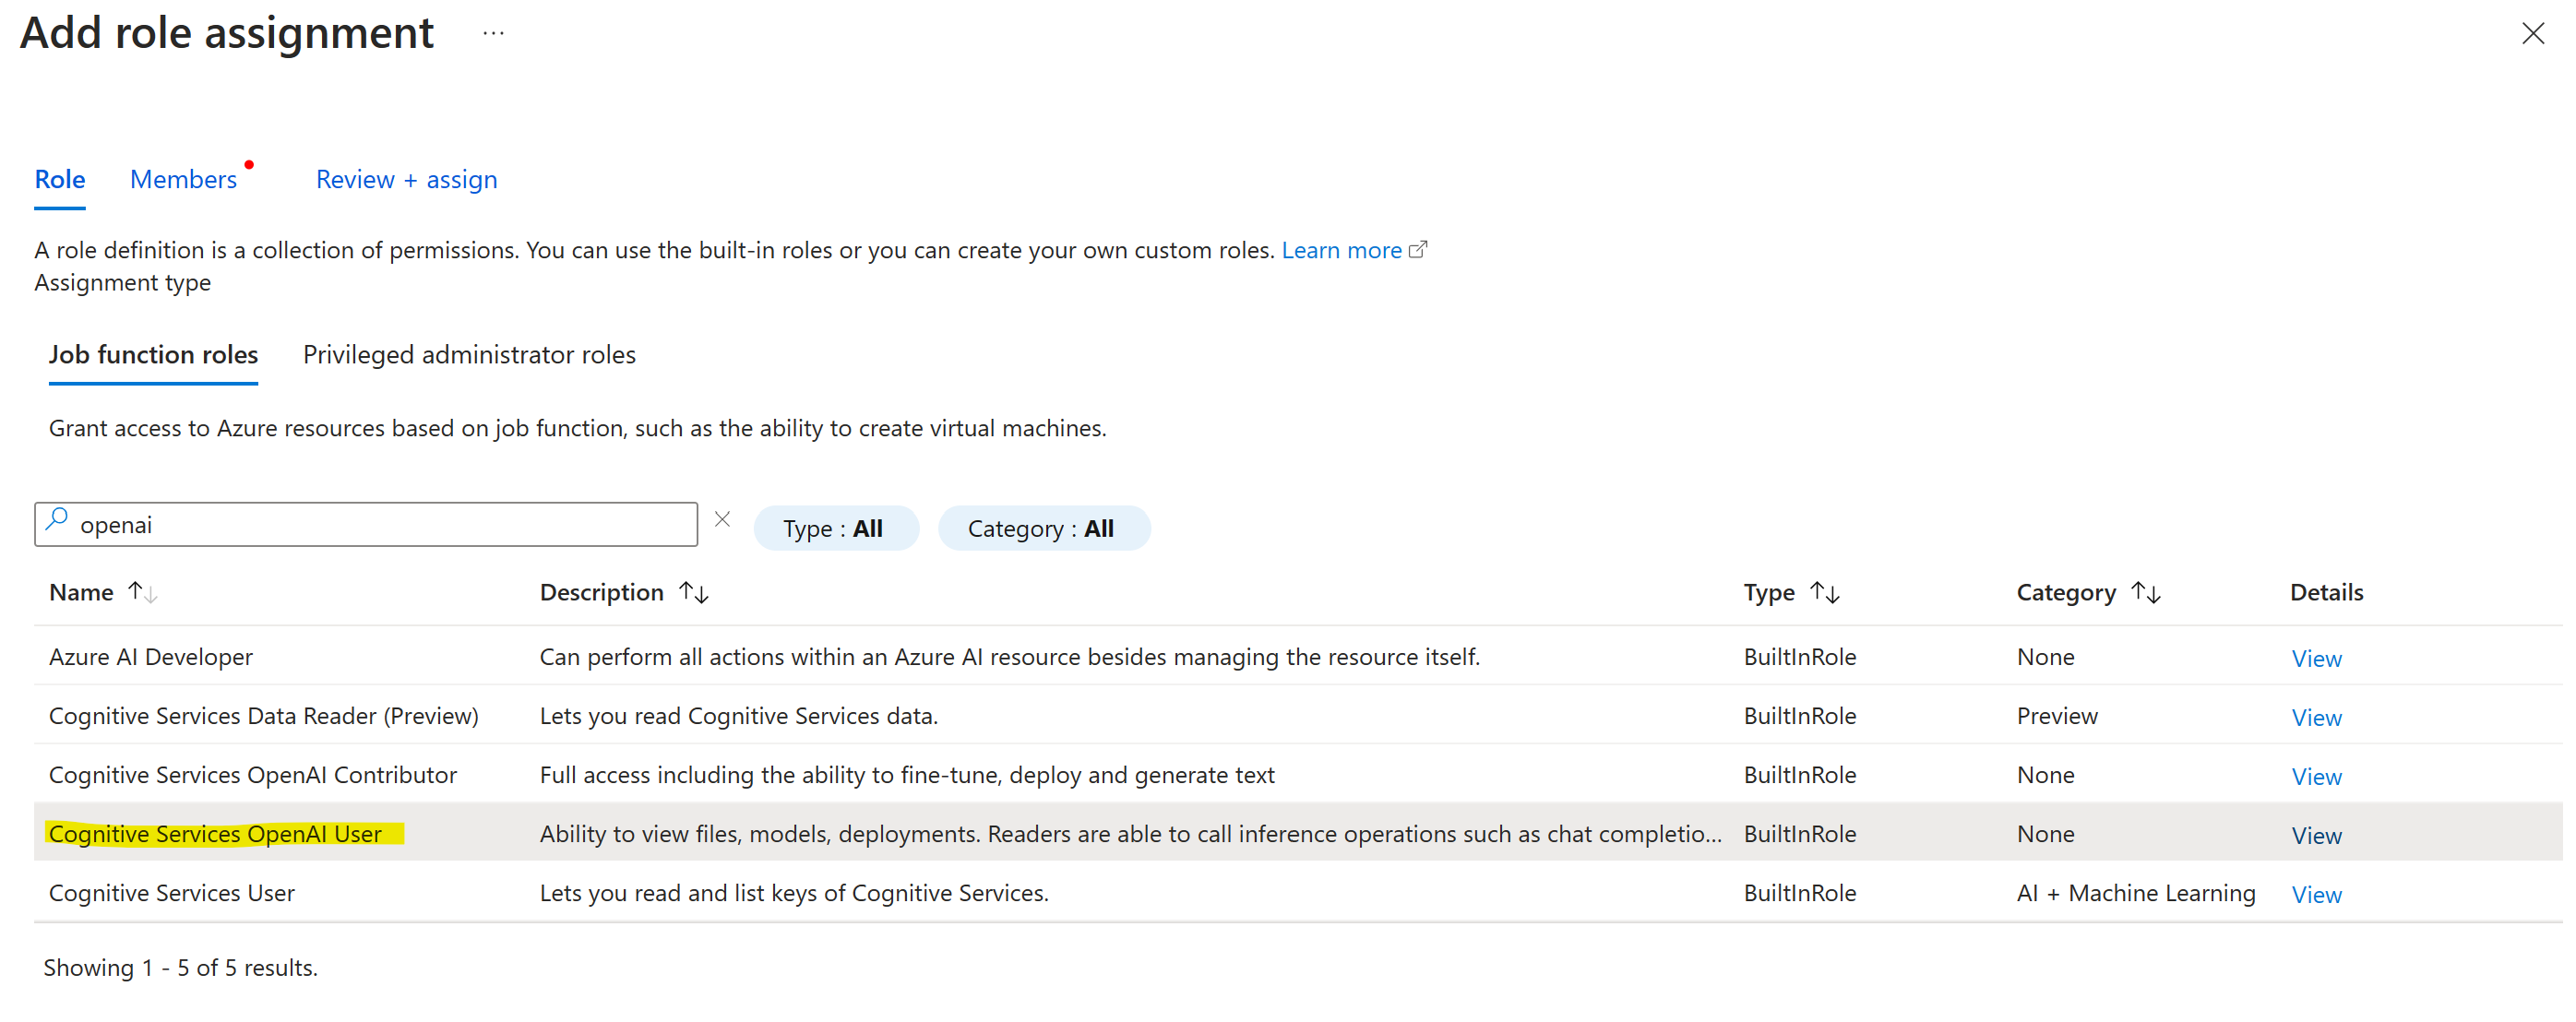
Click Next, select Managed Identity under Assign access to, then + Select Members, and select the Managed Identity of your API Management instance.
Import API schema into API Management #
Next, we need to add Azure OpenAI’s API schema into our APIM instance. For this, download the desired API schema for Azure OpenAI Service for the schema repo. In this post, we’ll be using version 2024-05-01-preview.
Once downloaded, open inference.json in the editor of your choice and update the servers section:
"servers": [
    {
    "url": "https://microsoft.com/openai",
    "variables": {
        "endpoint": {
        "default": "itdoesntmatter.openai.azure.com"
        }
    }
    }
],
We won’t use this, but in order to import the file into API Management, we need to a correct URL there.
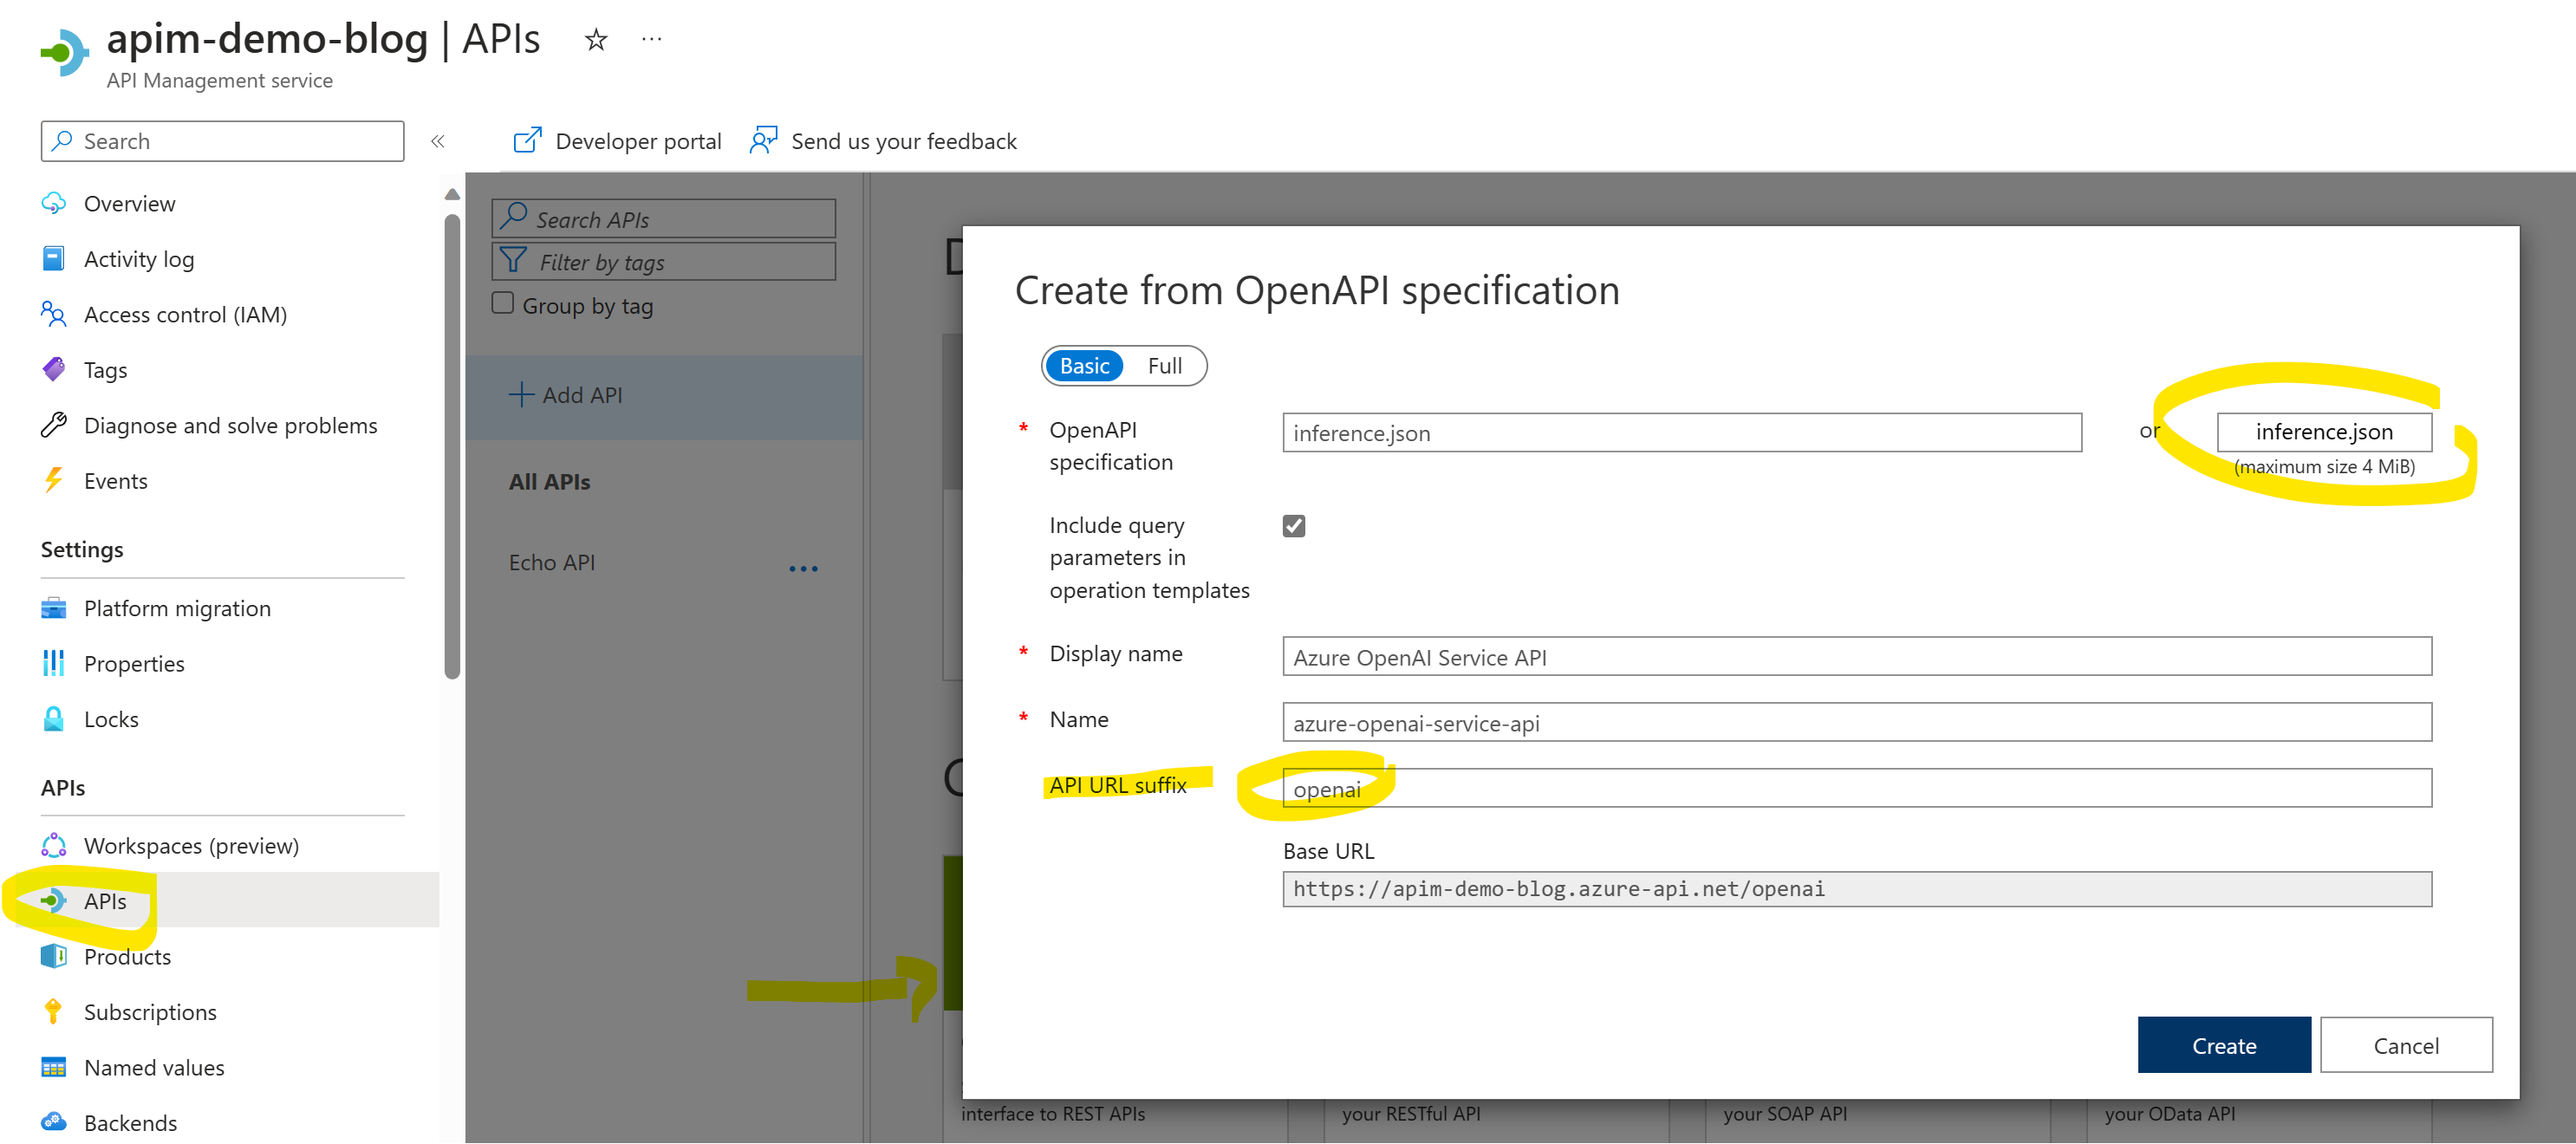
Now, let’s go to our API Management instance in the Azure Portal, then select API on the left side, click + Add API and select OpenAPI. In the dialog, load our inference.json and make sure to set API URL suffix to openai. Then click Create.
Configure API Management #
Next, let’s fully configure API Management. So select the new API, goto Settings, then go to Subscription and ensure Subscription required is checked and Header name is set to api-key. This is important to ensure compatibility with the OpenAI SDK.
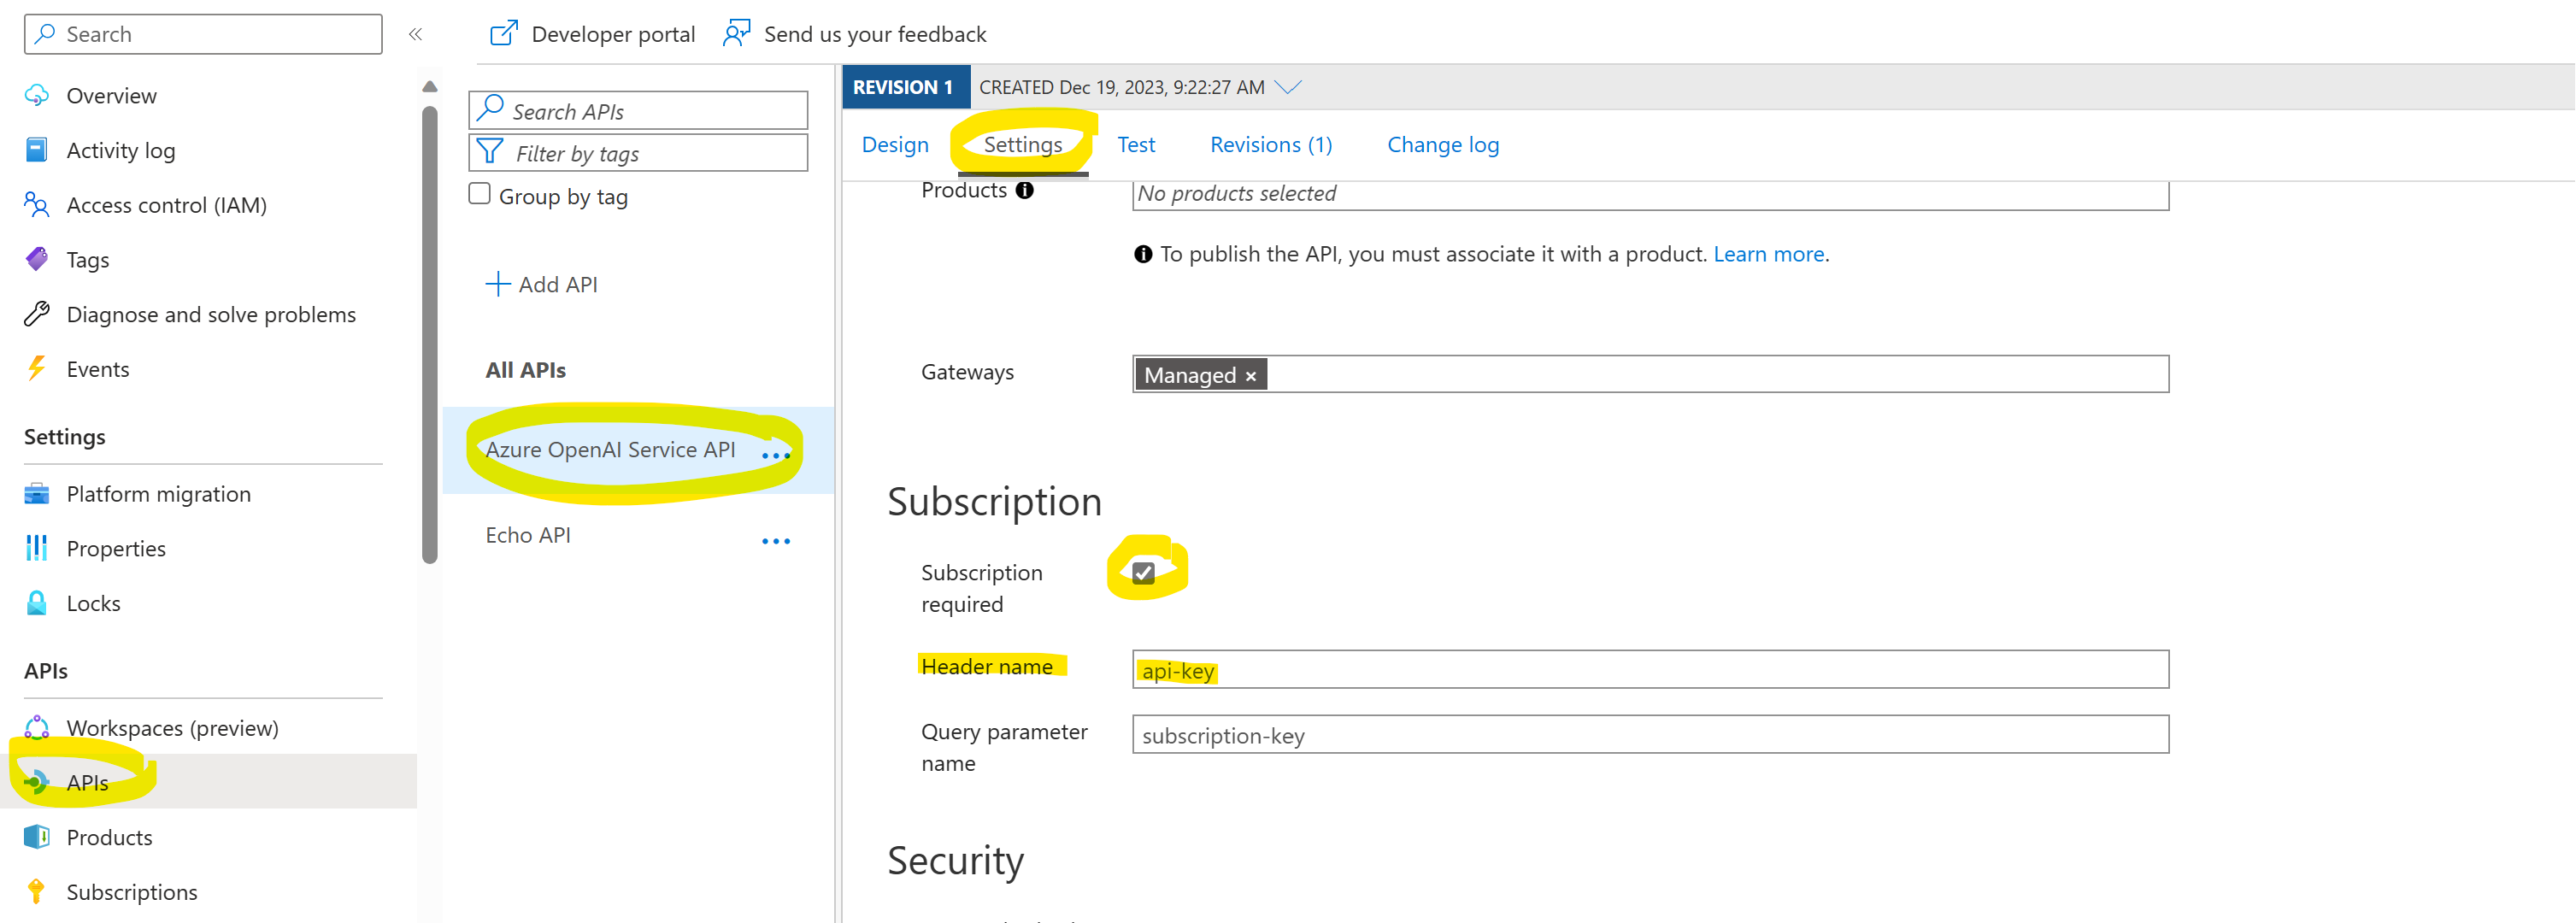
Also validate that API URL suffix is set to openai:

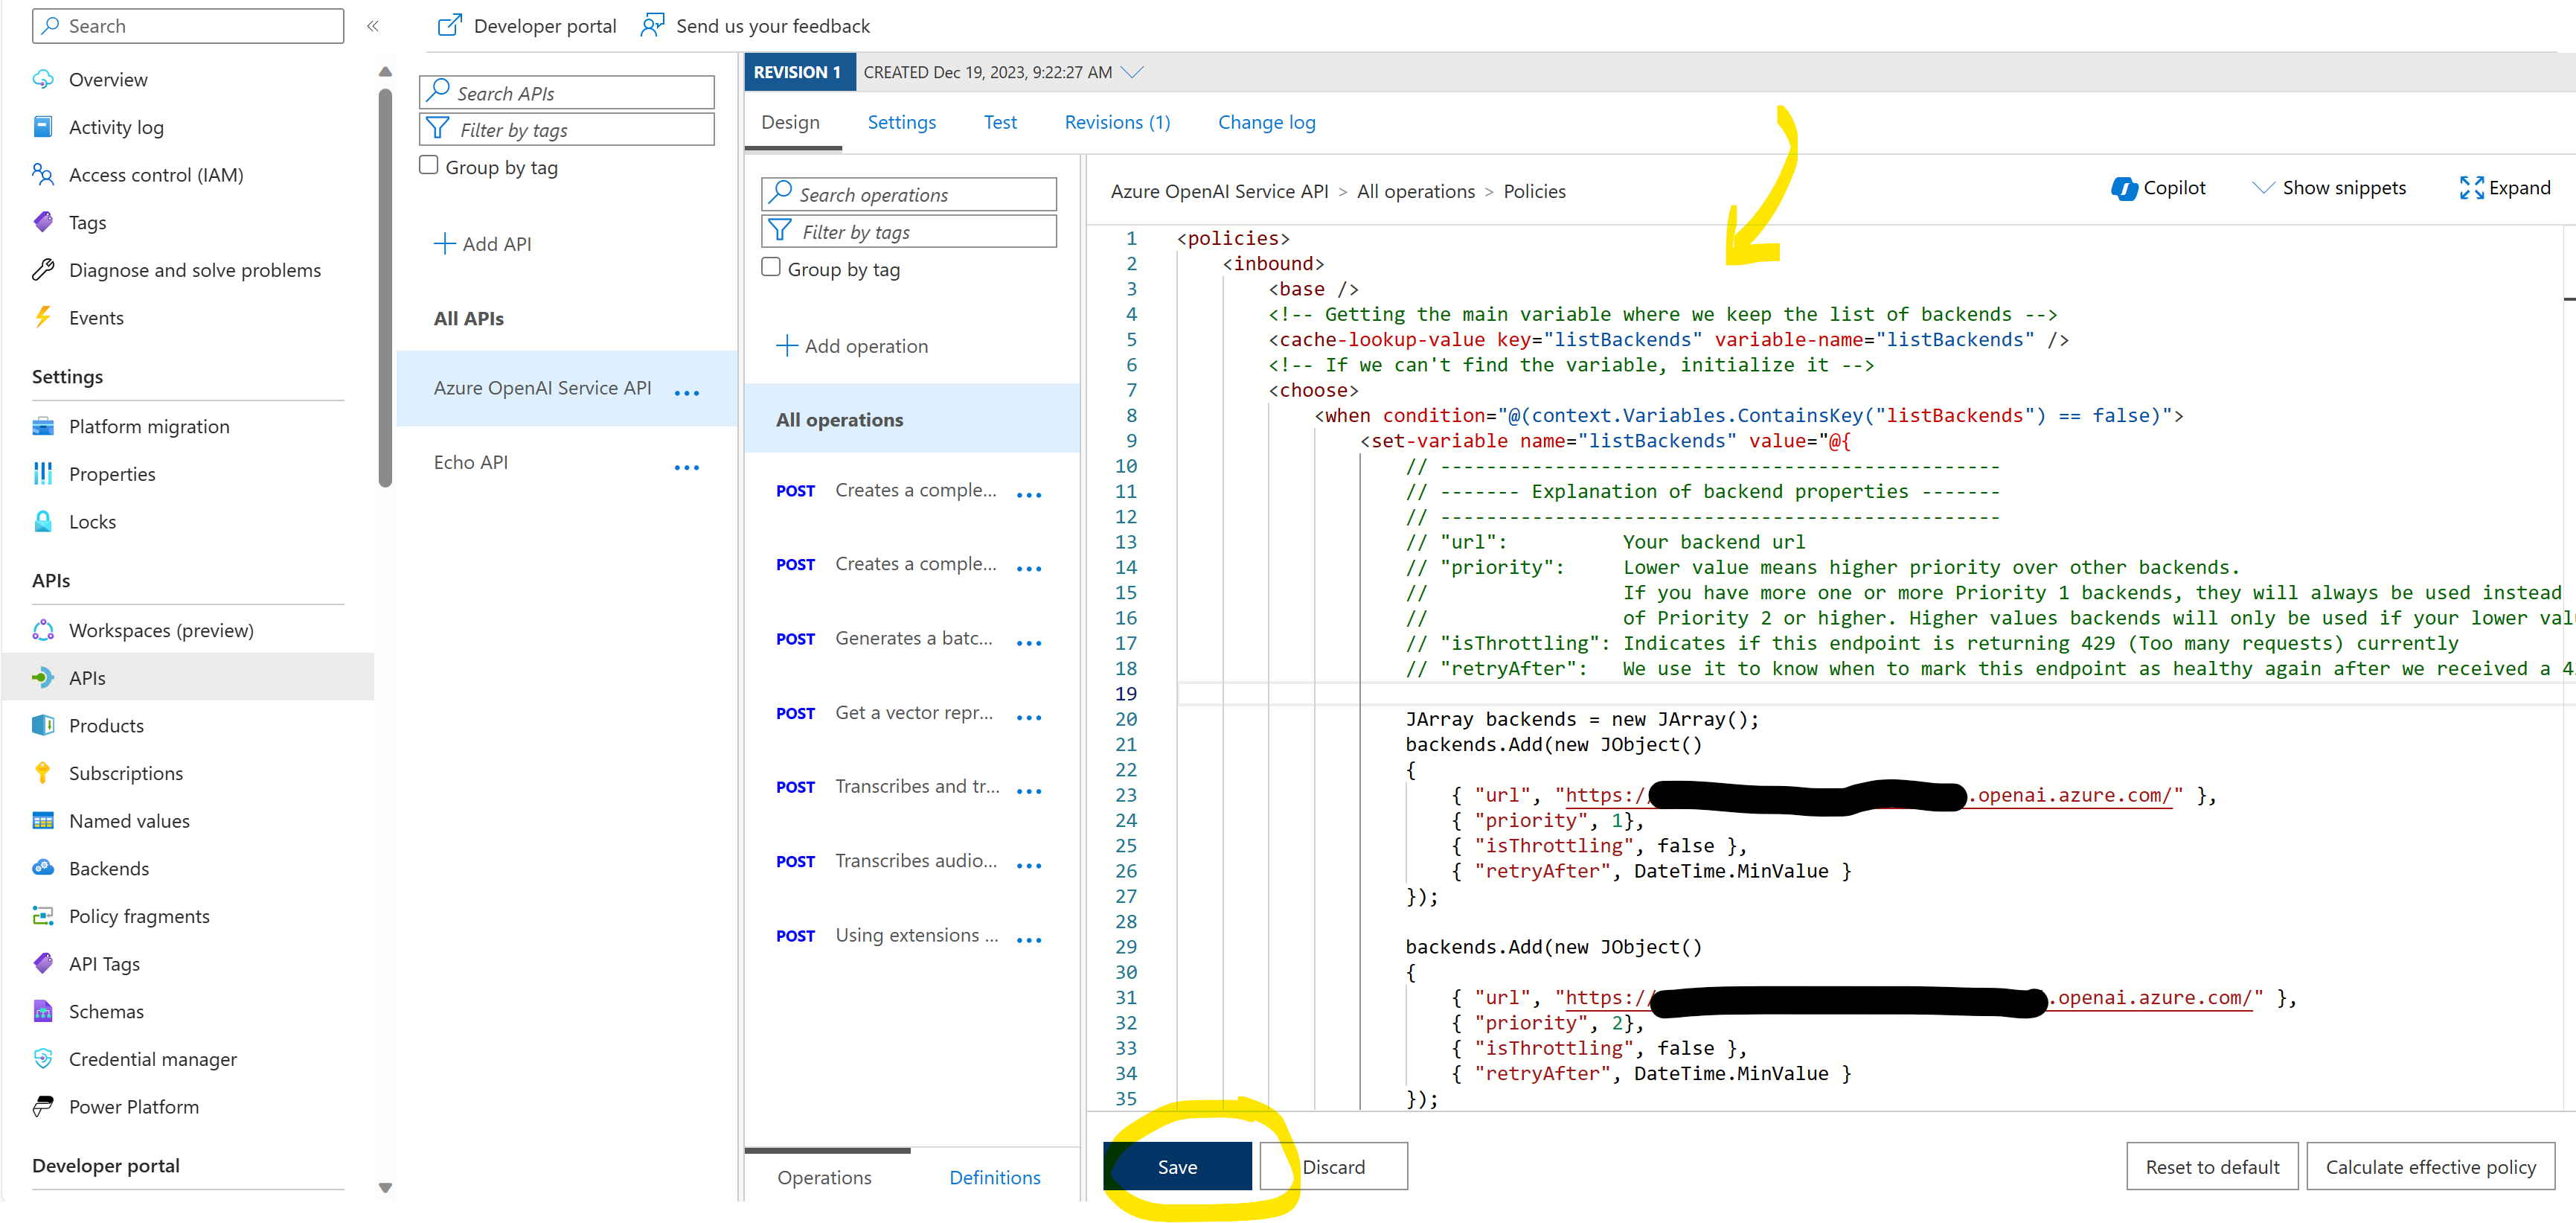
Now, download the apim-policy.xml from Azure-Samples/openai-apim-lb and edit the backends section as needed:
backends.Add(new JObject()
{
    { "url", "https://resource-sweden-1.openai.azure.com/" },
    { "priority", 1},
    { "isThrottling", false },
    { "retryAfter", DateTime.MinValue }
});
...
Make sure you add all the Azure OpenAI instances you want to use and assign them the desired priority.
To put this policy into effect, go back to API Management, select Design, select All operations and click the </> icon in inbound processing.
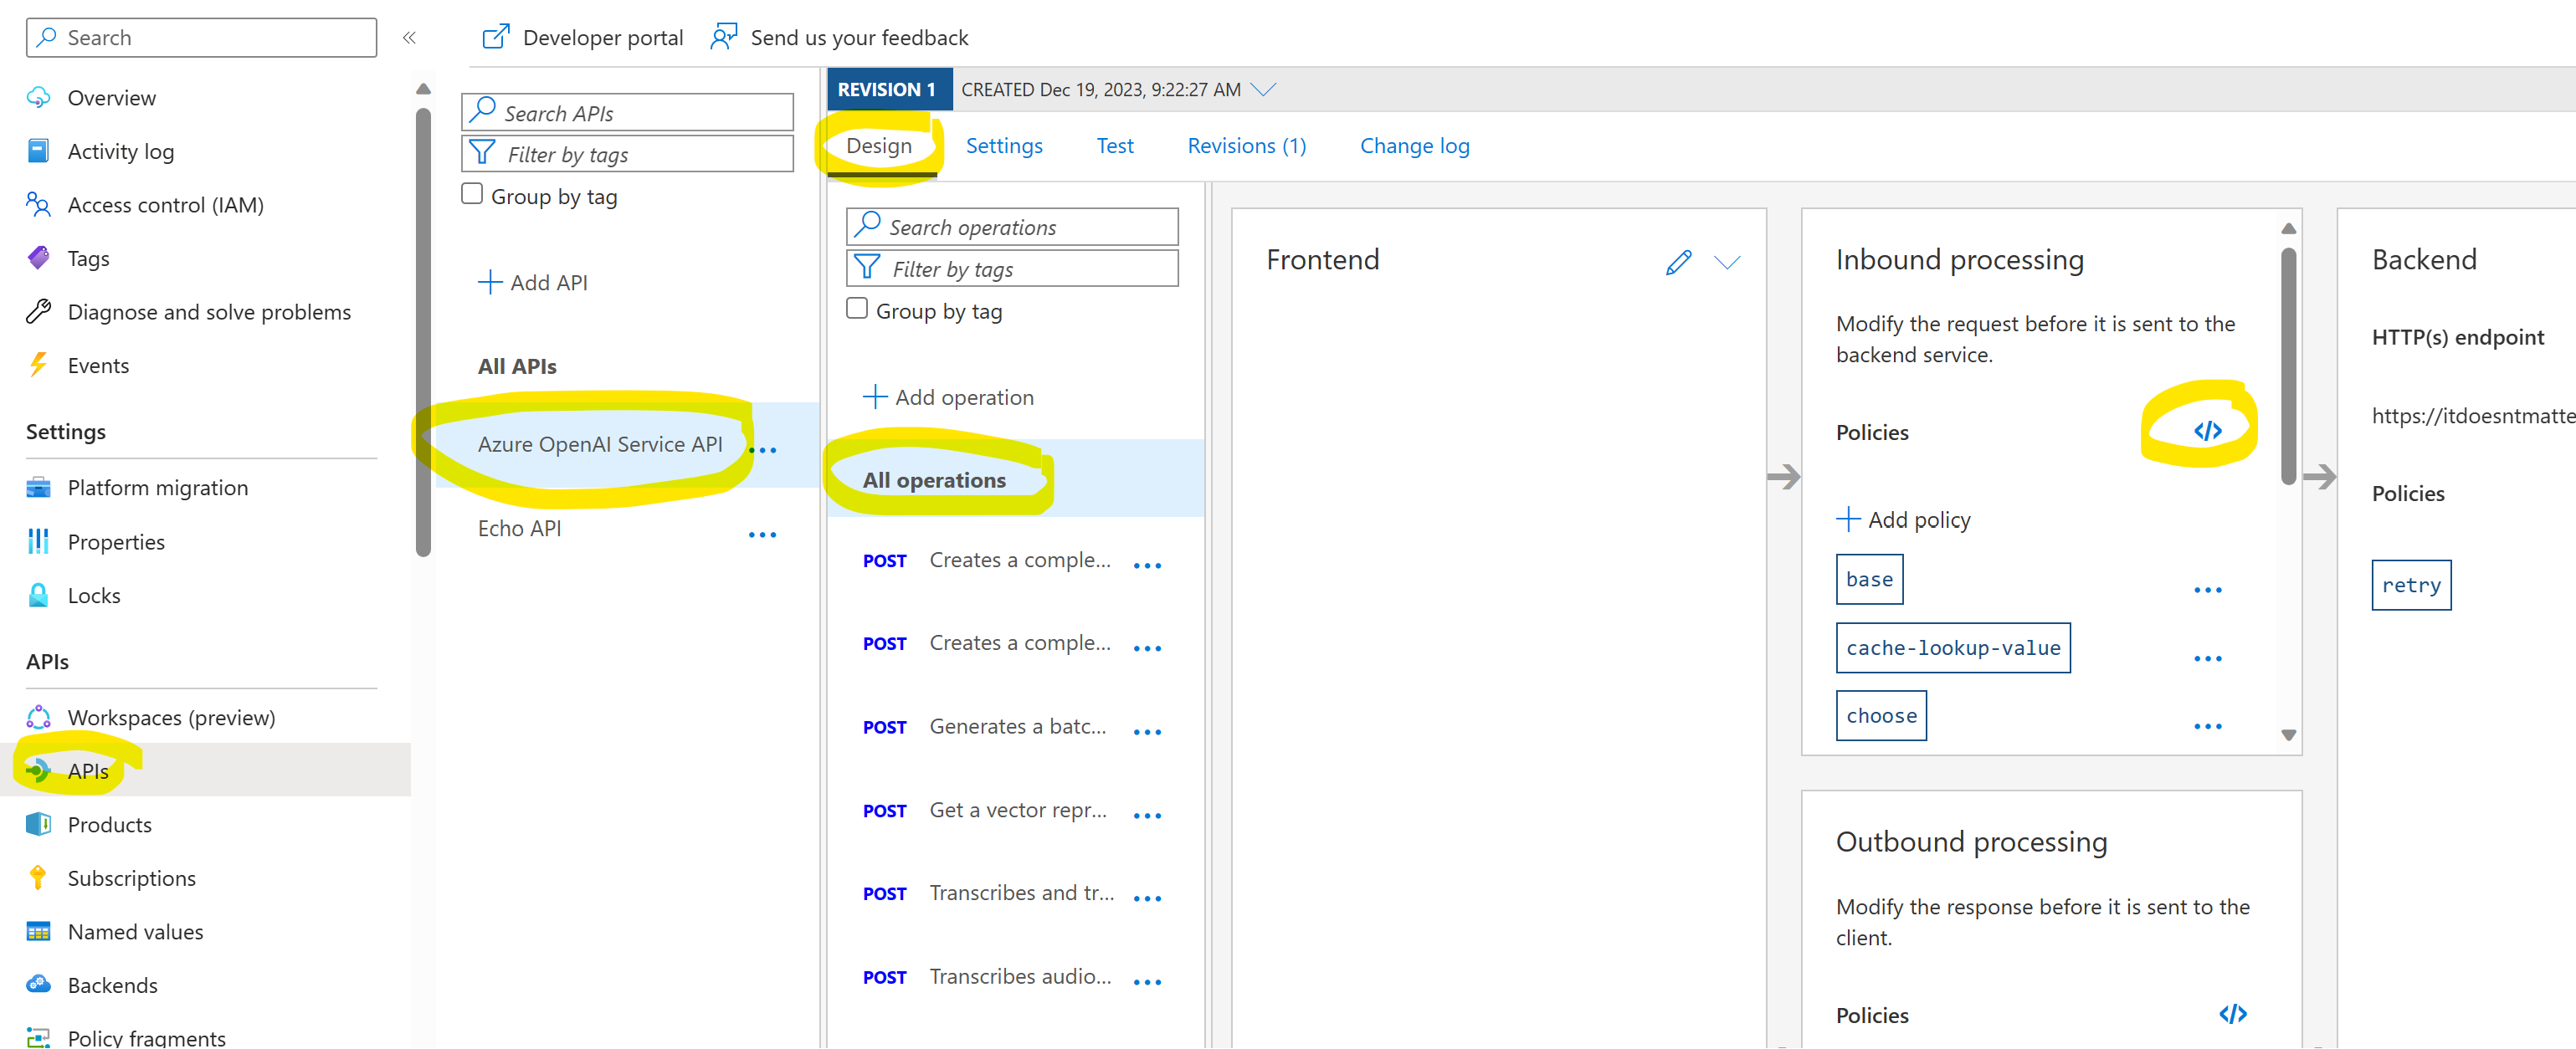
Replace the code with the contents of your apim-policy.xml, then hit Save:
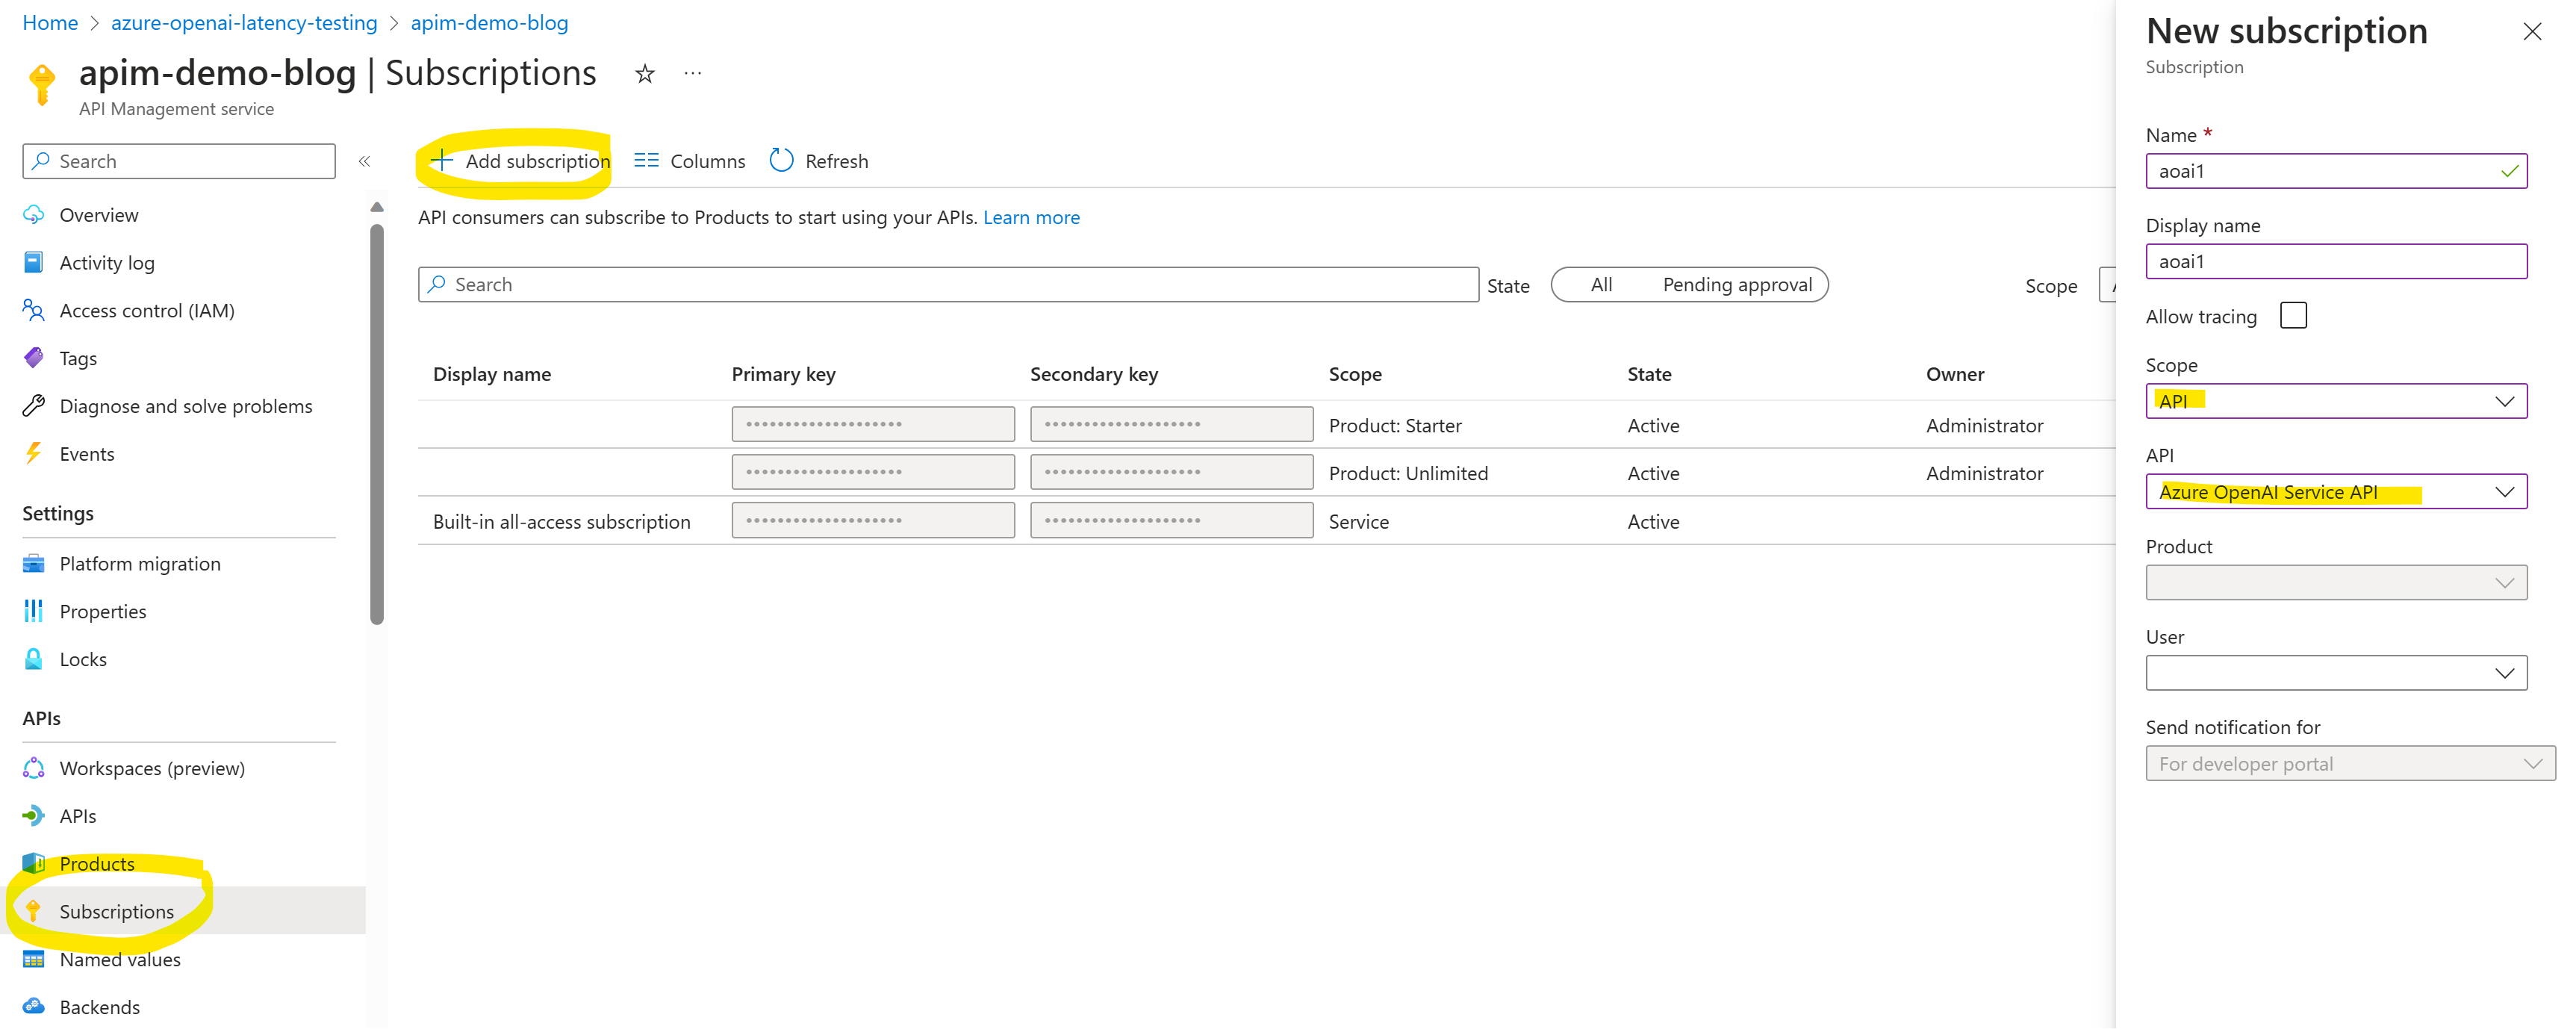
Lastly, goto Subscriptions in API Management, select + Add Subscription, give it a name and scope it API and select your Azure OpenAI Service API, click Create.
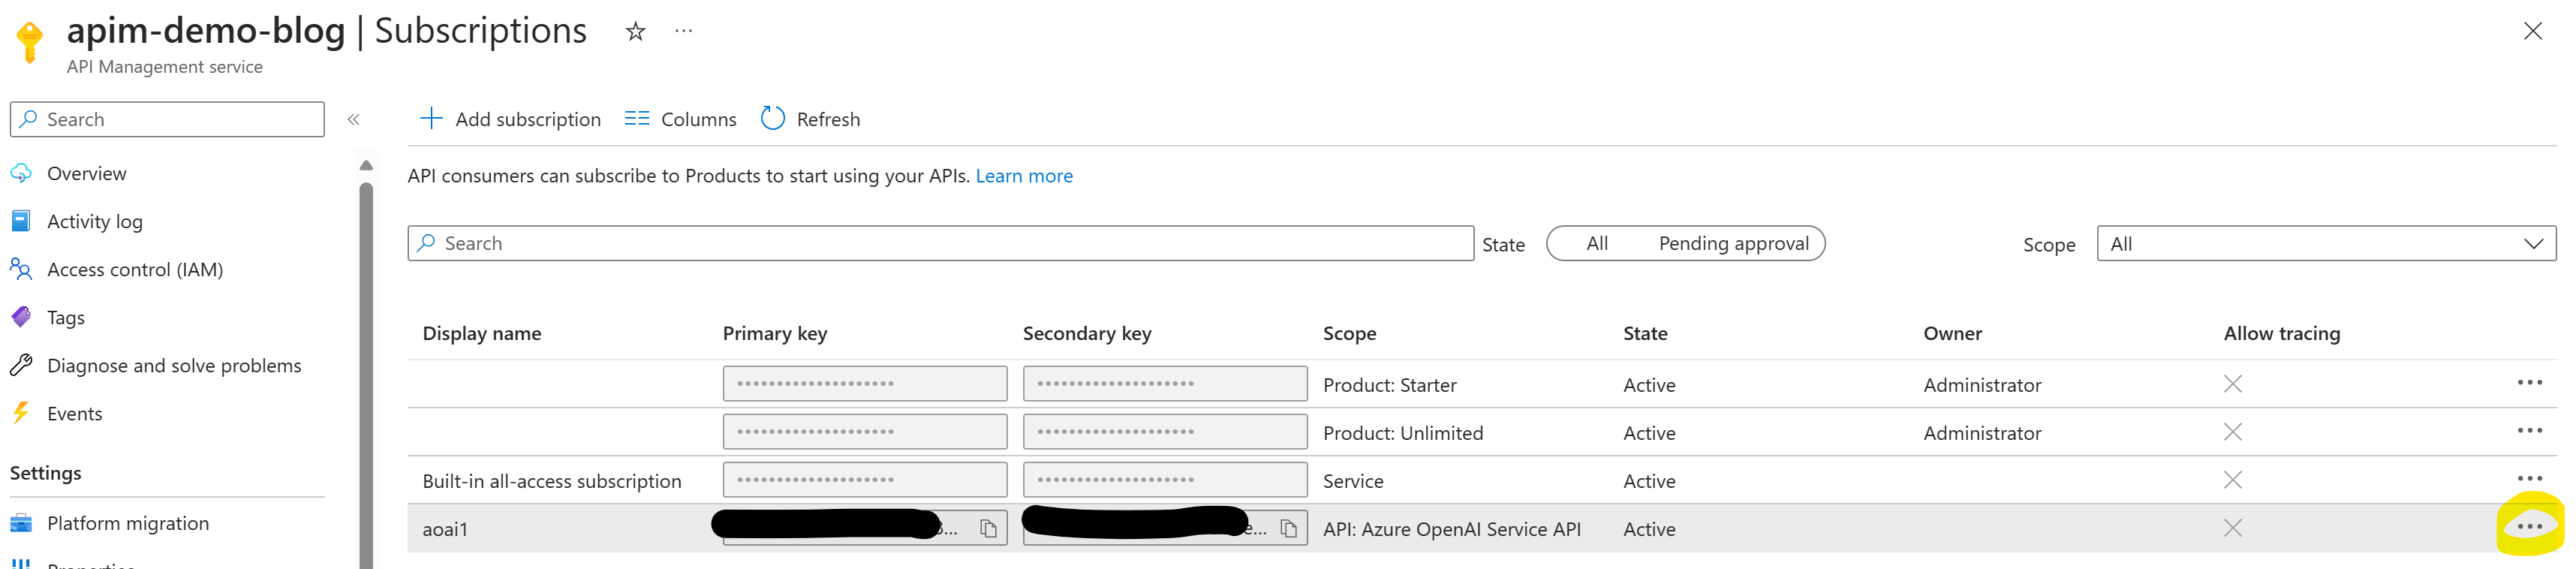
Then get the primary subscription key via the ... on the right side, we need this for the next step:
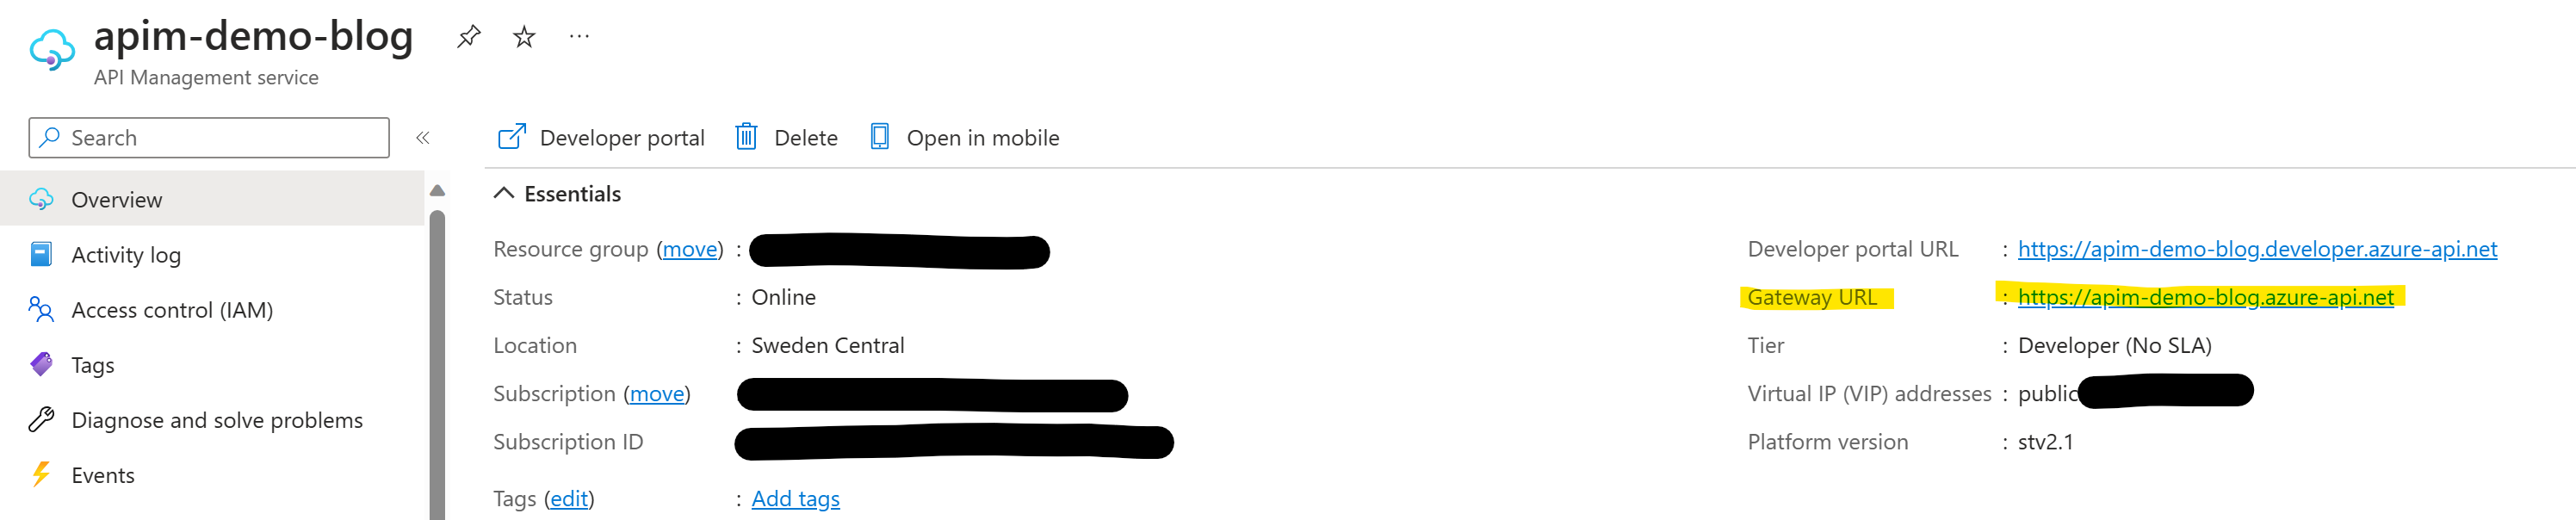
Lastly, we also need the endpoint URL, which we can find on the overview page:
Test it #
Finally, we can test if everything works by running some code of your choice, e.g., this code with OpenAI Python SDK (v1.x):
from openai import AzureOpenAI

client = AzureOpenAI(
    azure_endpoint="https://<your APIM endpoint>.azure-api.net/",
    api_key="<your APIM subscription key>",
    api_version="2024-05-01-preview"
)

response = client.chat.completions.create(
    model="gpt-35-turbo",
    messages=[
        {"role": "system", "content": "You are a helpful assistant."},
        {"role": "user", "content": "Does Azure OpenAI support customer managed keys?"}
    ]
)
print(response)
Our response looks good:
ChatCompletion(id='chatcmpl-8XnvnKVt0KFORZw5Z0T3I9Z45fpnP', choices=[Choice(finish_reason='stop', index=0, message=ChatCompletionMessage(content="Yes, Azure OpenAI offers support for customer managed keys. With customer managed keys, you can maintain control and ownership of your encryption keys used to protect your OpenAI resources and data. By managing your own keys, you have the ability to control access to your data and ensure compliance with your organization's security policies.", role='assistant', function_call=None, tool_calls=None), content_filter_results={'hate': {'filtered': False, 'severity': 'safe'}, 'self_harm': {'filtered': False, 'severity': 'safe'}, 'sexual': {'filtered': False, 'severity': 'safe'}, 'violence': {'filtered': False, 'severity': 'safe'}})], created=1703067451, model='gpt-35-turbo', object='chat.completion', system_fingerprint=None, usage=CompletionUsage(completion_tokens=63, prompt_tokens=26, total_tokens=89), prompt_filter_results=[{'prompt_index': 0, 'content_filter_results': {'hate': {'filtered': False, 'severity': 'safe'}, 'self_harm': {'filtered': False, 'severity': 'safe'}, 'sexual': {'filtered': False, 'severity': 'safe'}, 'violence': {'filtered': False, 'severity': 'safe'}}}])
Summary #
In this post, we’ve demonstrated a straightforward method for bundling multiple Azure OpenAI resources behind Azure API Management. This approach seamlessly facilitates spillover in scenarios where we encounter the TPM or RPM limit of a resource, or when reaching the overall throughput in Azure OpenAI’s committed capacity model. Once again, a special acknowledgment to Andrew Dewes for his original implementation: andredewes/apim-aoai-smart-loadbalancing