Analyzing Call Center Transcripts with Azure Cognitive Search and PowerBI
Table of Contents
Introduction #
This post explains how we can search and analyze call center transcripts using Azure Cognitive Search and PowerBI. This can be helpful to analyze what is going on in your call center and allows to easily answer questions like:
- Why are people calling? What are typical topics?
- What is the sentiment?
- How does sentiment and how do topics change over time?
Having these answers can help optimize your call center strategy, but also potentially allows to offload easier tasks to voice-enabled bots.
Before we get started, all json documents and data samples can be found in this repo: csiebler/cognitive-search-call-transcripts
Cognitive Search Setup #
Data pre-processing #
Let’s first look at a short data sample that we’ll use for this tutorial:
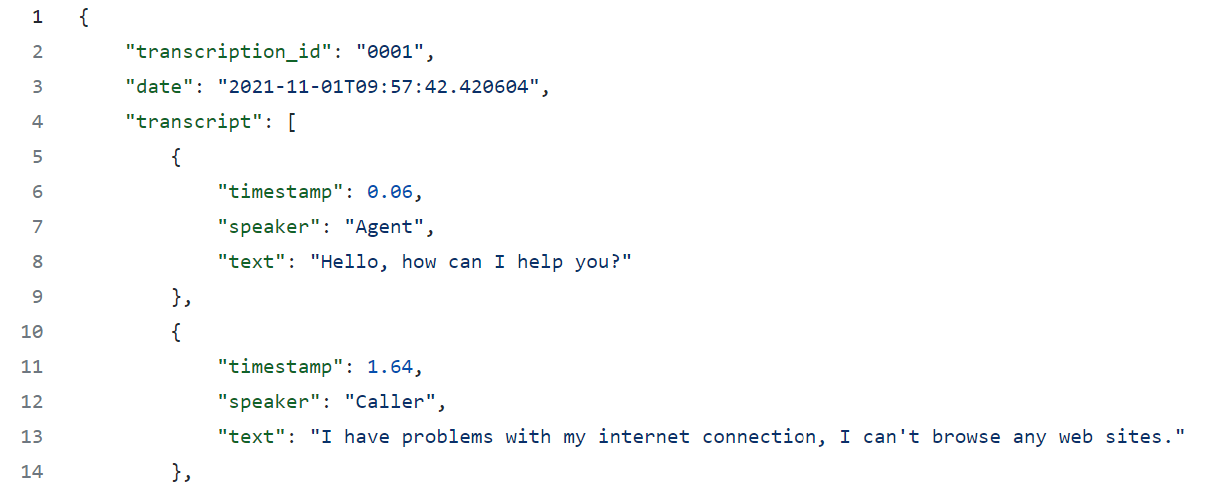
As you can see, our input data follows a quite simple schema. However, in reality you might want to use transcripts from the Azure Speech-to-Text Batch Transcription API. However, since these transcripts are very detailed and verbose, I’d recommend to reduce them down a bit first. For example, you can run this basic scripts against a few of your sample documents: cognitive-search-call-transcripts/preprocess.py. Just put them in a folder, update the path and let the script do its work.
One you have the transcripts converted, upload them to a new container in an Azure Storage Account.
In case you do not have any documents ready to use, feel free to use my wonderful, hand-written transcripts from this GitHub repo: cognitive-search-call-transcripts/data/2021/11
Required Azure Resources #
This tutorial assumes that you have already created a Cognitive Search instance, as well as a Storage Account and a Cognitive Services resource.

Furthermore, be sure to have the following information at hand:
- The Connection String, Name, and Access Key of your Storage Account
- The account key and resource id of your Cognitive Services Resource
In general, I’d recommend to use Managed Identities for data access, but for the sake of this tutorial it might be easier to just rely on keys. For production, always use Managed Identities if possible!
Furthermore, for this tutorial I suggest to use the VSCode Cognitive Search extension. This allows you to super easily create indexes, indexers, data sources, skillsets and synonym maps. Furthermore, it allows you to reset and run an indexer with a few clicks, so it makes development much faster!
Data Source creation #
First, let’s upload your transcripts to a new container on the Storage Account. Once done, you can create a new data source in Cognitive Search. For this, update the credentials and container name in the following json document and use the VSCode Cognitive Search extension to create the data source.
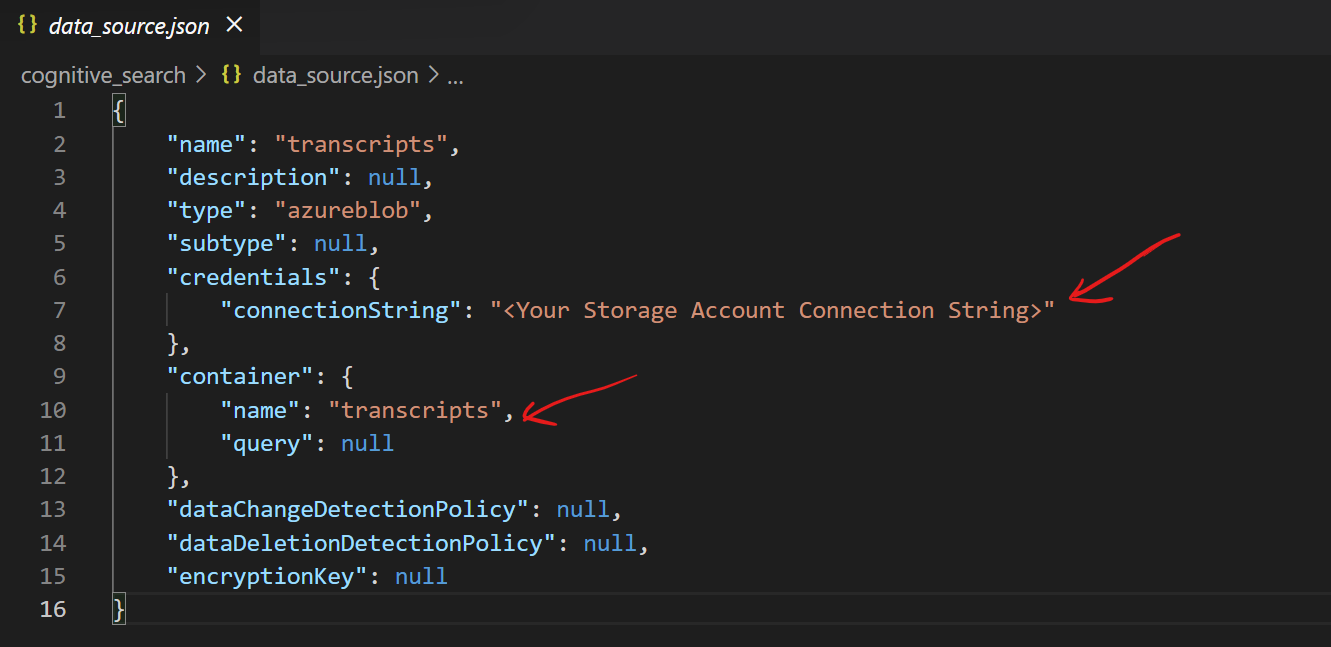
You can find the full json here.
Index creation #
Next, we create our index. There is not really the need to adapt anything here, unless you want to add more fields:
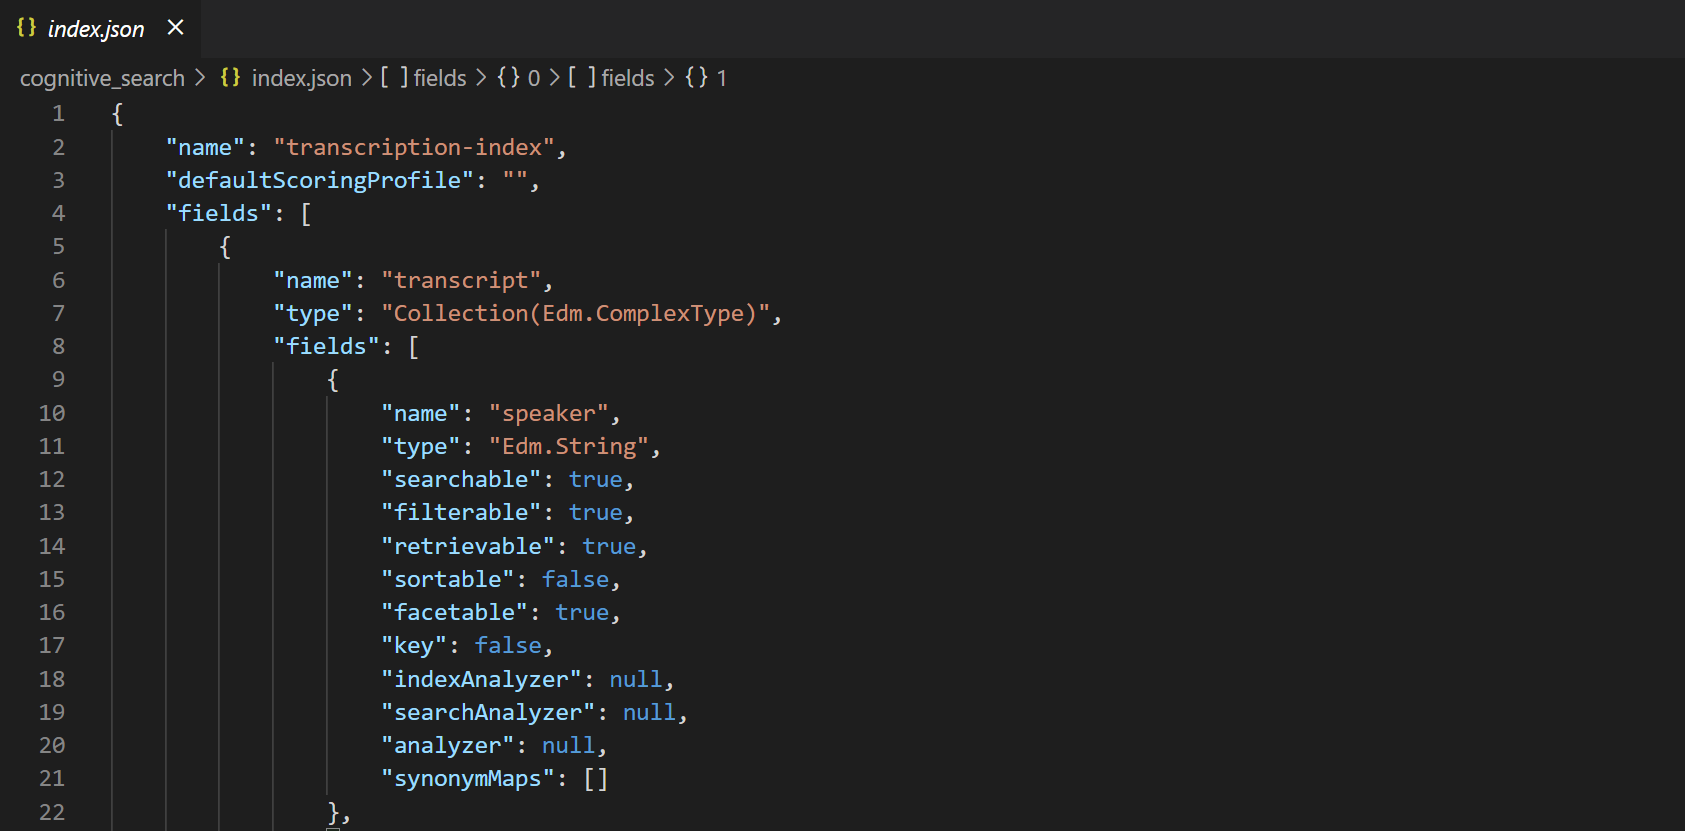
You can find the full json here.
Skillset creation #
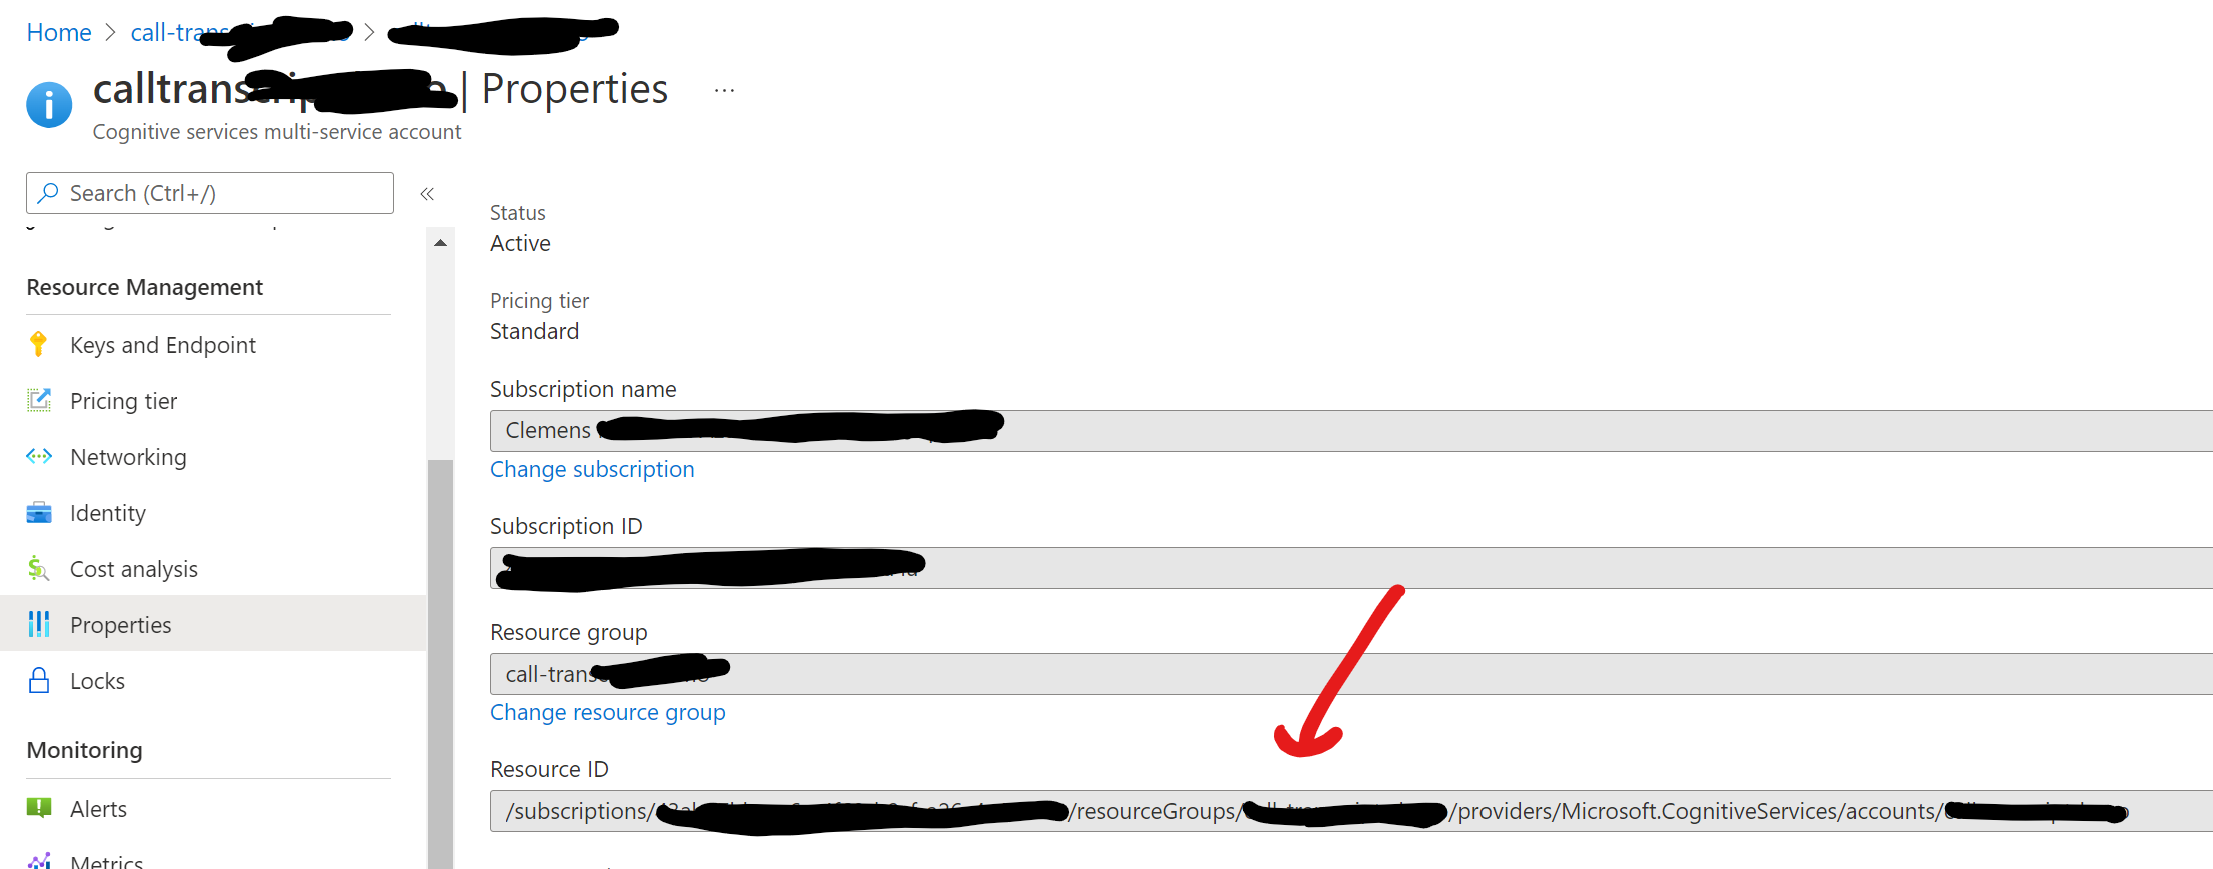
Next, we create our skillset. You will need to add your Cognitive Services resource id and also the key. The resource id is in the following format:
/subscriptions/<subscription id>/resourceGroups/<resource group>/providers/Microsoft.CognitiveServices/accounts/<cognitive service name>
You can find it in the Azure Portal or via the CLI:
Lastly, you will also need to add your Storage Connection String, so Cognitive Search can store its projections in an Azure Table. We’ll use this table to later generate real-time dashboards using PowerBI.
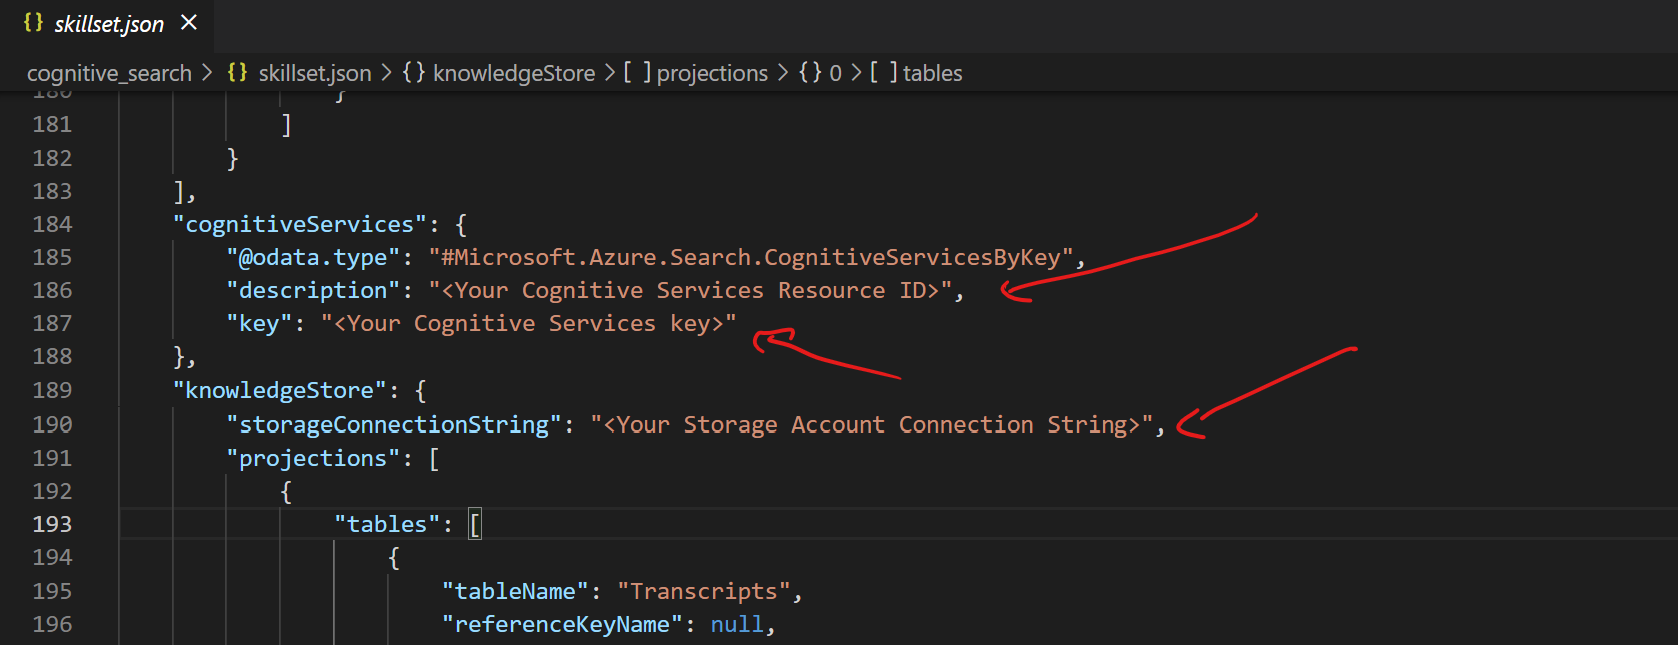
You can find the full json here.
Indexer creation #
Lastly, we create our indexer. Unless you added more fields to the index, you won"t need to touch this file.
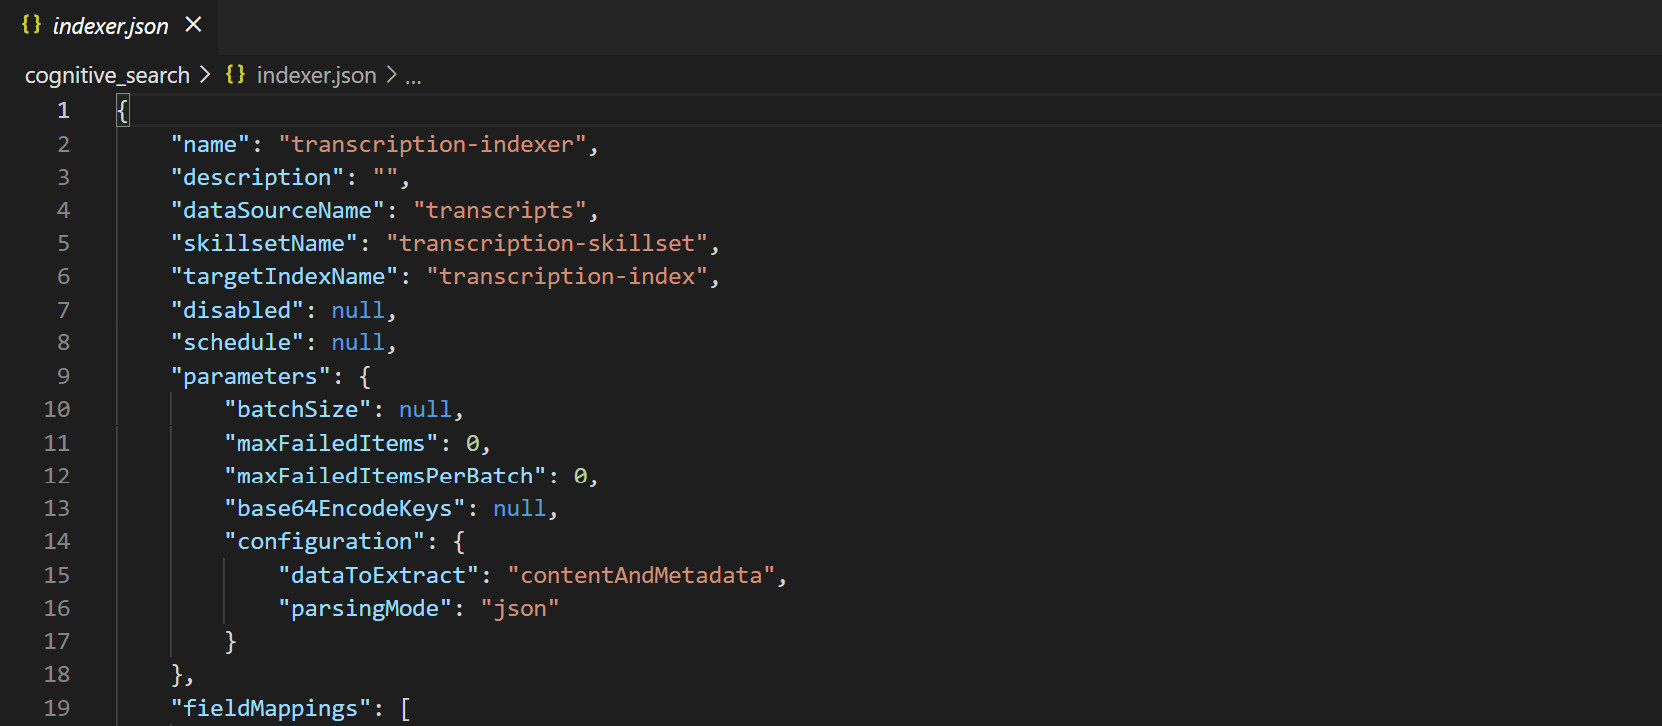
You can find the full json here.
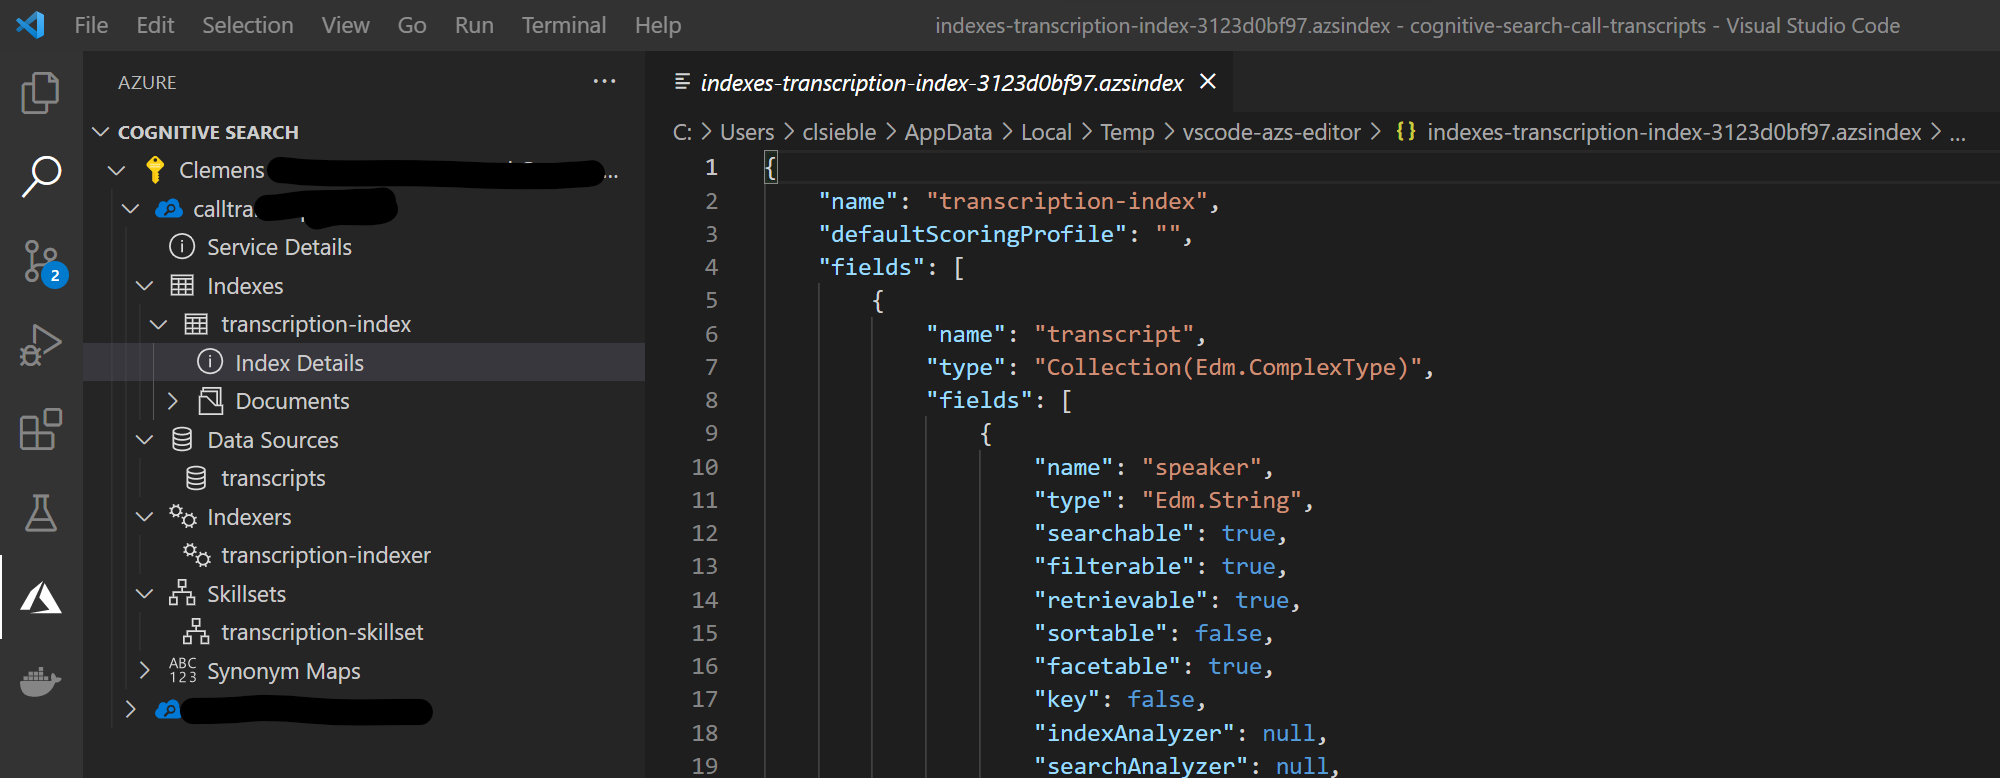
Finally, we can run the indexer and check if our index contains documents:

Perfect, that looks good! Finally, we can run queries against our search index.
Visualization with PowerBI #
Since your skillset creates a Table Projection of the data, we can point PowerBI to read from the Azure Table where the data is stored. From there, we can build a KPI dashboard for our transcripts.
Follow this tutorial to connect PowerBI to your Azure Table with the projections. Once done, we can start building dashboards. In this case, the dashboards look a bit “lonely”, but once we’d have real and more data in Cognitive Search, we’d be able to derive a lot of insight from it!
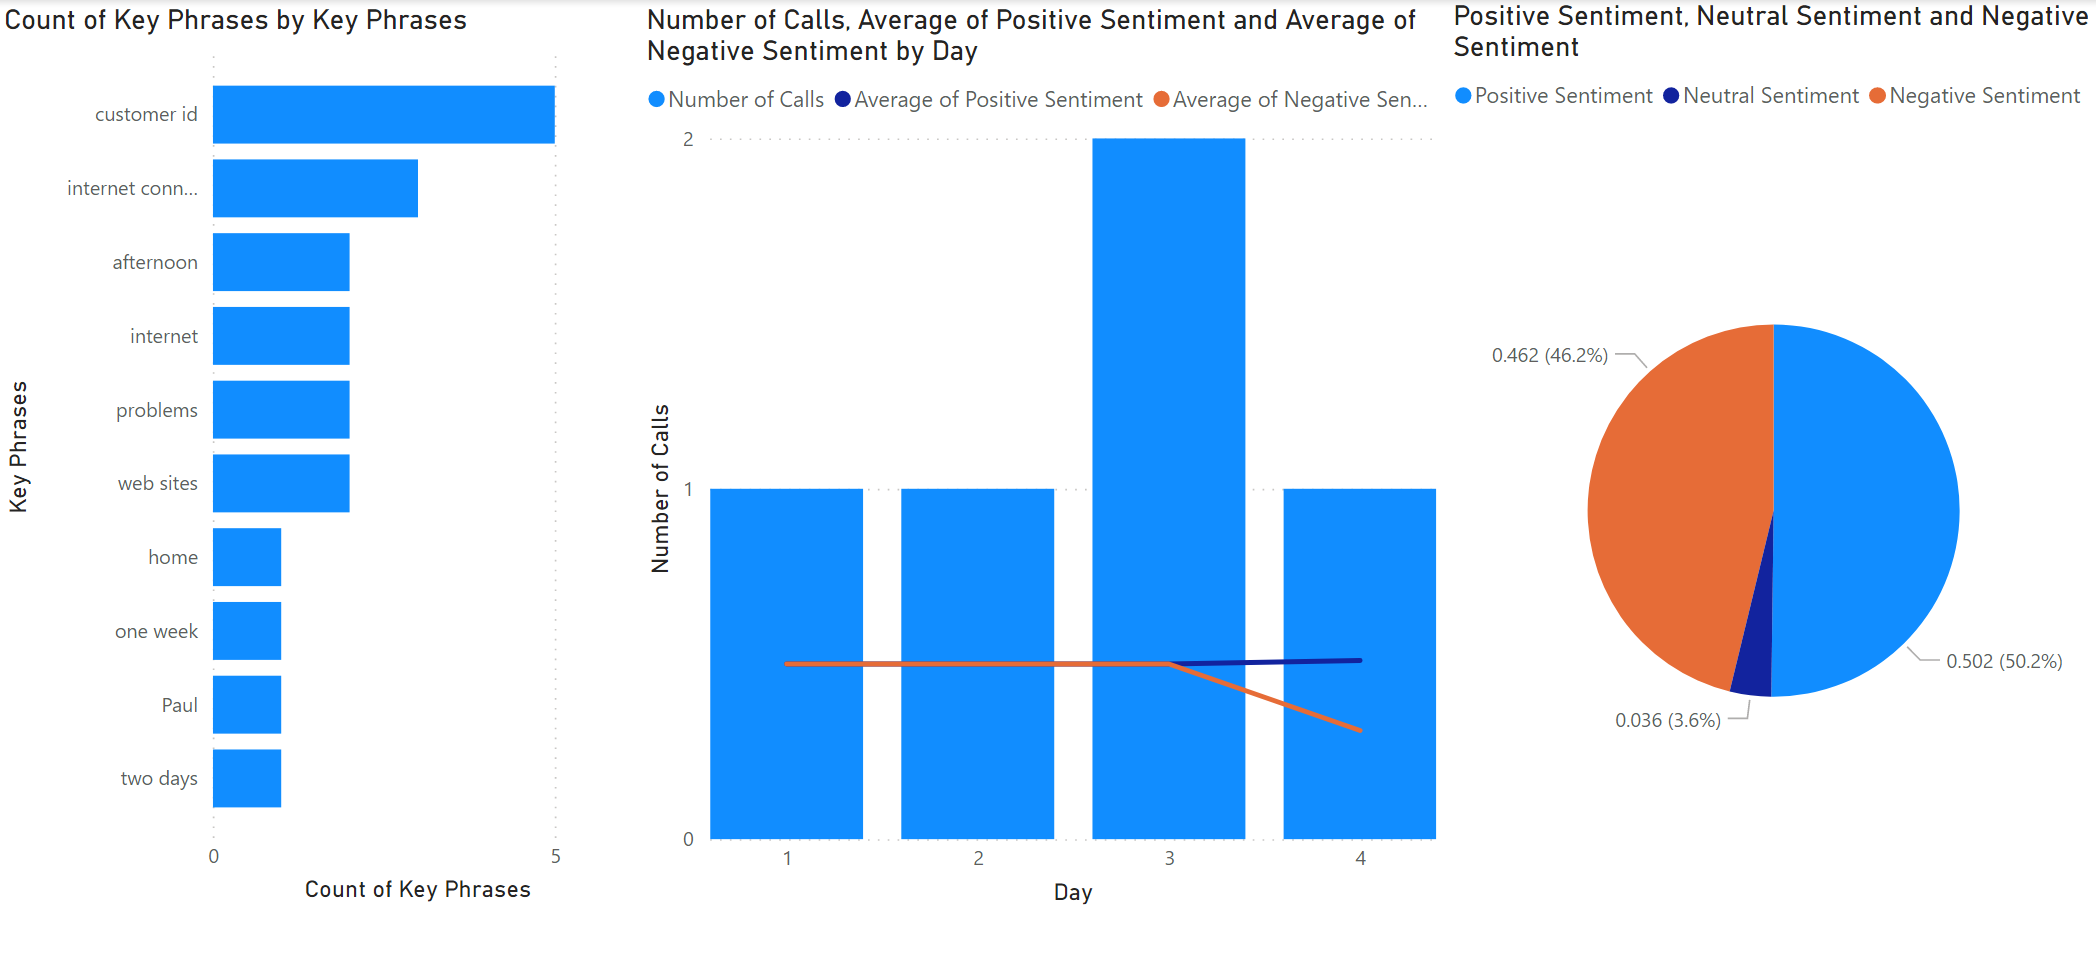
For example, we can easily build queries like:
- Which key phrases have positive/negative sentiment associated with them?
- Which key phrases are most common?
- Are there trends in terms of sentiment or key phrases over time?
- …and a lot more!
This new insight will hopefully help to identify strong areas, as well as areas for improvement.
Summary #
In this post we showed how Azure Cognitive Search can be used to index call center transcripts (generated from Azure Speech-to-Text). We can use the solution to search for calls (e.g., educational purposes), but then also use this data to build rich KPI dashboards using PowerBI.